Like changing a flat tire and sewing on a button, knowing how to bake a cake from scratch is an essential life skill. (Dang, I keep meaning to learn how to change a tire.) It might not be as important as starting a fire without matches, but it’s not far behind. Everybody needs cake!
People always assume that because I bake, I’m a whiz at cooking too. It’s not true. Baking and cooking are two entirely different things. I don’t throw ingredients in a pan and create magic. That’s cooking. But I do carefully measure ingredients according to a recipe and create chemical reactions that result in deliciousness. That’s baking.
Which brings me to rule number one in baking a cake: Follow the recipe closely. Don’t add “a dash of this” and a “dash of that” unless you’re comfortable experimenting and can accept the risk of a flat, too dense or undercooked cake. Precision is important. Before you even begin, read through the recipe and make sure you have all the ingredients and know-how.
So let’s bake a simple, universally adored cake: plain yellow. And if you aren’t ready for scratch yet, the rules below also apply to baking a cake from a mix.
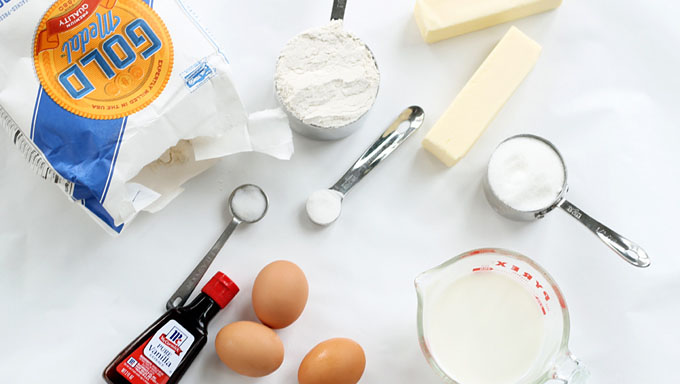
Gather your ingredients.
Most basic cake recipes will have:
Flour: Different flour types yield different consistencies of cake, so choose the type of flour suggested in the recipe—most often all-purpose flour. Measure the flour in a dry measuring cup, leveling the top of the cup with a knife. Youshould really weigh the flour for precision (what with the whole “baking is a science” thing), but many of us here in the States lack food scales thanks to the metric system-resistant powers that be.
Leavening: This means the baking soda and/or baking powder. Again, use precisely the amount stated in the recipe and do not substitute one for the other. While they are both leaveners, they are not interchangeable.
Salt: Use plain old table salt unless your recipe calls for something else.
Softened butter: Your butter should be softened, meaning it holds its shape, but pressing on it will leave an impression. It should not be melted at all. To soften butter, let it sit out at room temperature for 30 to 60 minutes. Because I never have time, I usually soften butter in the microwave for 10 to 15 seconds at 30 percent power. Err on the side of less time, though, as a microwave can start to melt butter quickly.
Sugar: Use plain old granulated sugar unless your recipe calls for something else.
Eggs: Most recipes will call for large eggs. Some suggest bringing the eggs to room temperature before mixing your batter. If you have the time, by all means do so. But unless you’re creating an airy cake with whipped batter, such as a chiffon or angel food cake, I find the difference is negligible.
Vanilla extract: Use the real stuff, not imitation. The consistency will stay the same, so science isn’t the reason, just flavor. Here is an area where you’ll be okay experimenting. Try adding different flavors of extract with the vanilla at minimal risk, such as lemon or orange.
Milk: Or sour cream, or buttermilk, or heavy cream. Recipes may differ when it comes to the liquid. If you can’t do the full fat versions, I suggest at least two percent fat (not skim). Measure in liquid measuring cups for accuracy.
Preheat the oven.
Once you’re sure you have all the right ingredients, turn on the oven and make sure it’s fully preheated. In fact, start preheating before you even gather your ingredients, as it can take about 20 minutes. To be sure your oven temperature is accurate, you may want to invest in an oven thermometer. Because the oven is pretty important in baking a cake!
Choose and prepare your pans.
With most standard cake recipes, you can use a Bundt pan, two 8 or 9-inch round pans, cupcake tins or a 9x13-inch pan. Here, I’m making a 9x13-inch cake. Glass bakeware is best for cakes because while it takes longer to heat and you may need to add 5 to 10 minutes of cooking time, the temperature is more stable. Shiny metal pans are also good for evenly-baked cakes. Dark pans tend to heat up too quickly and bake less evenly. If you only have a dark pan, I suggest you lower the oven temperature from the recipe by about 25 degrees.
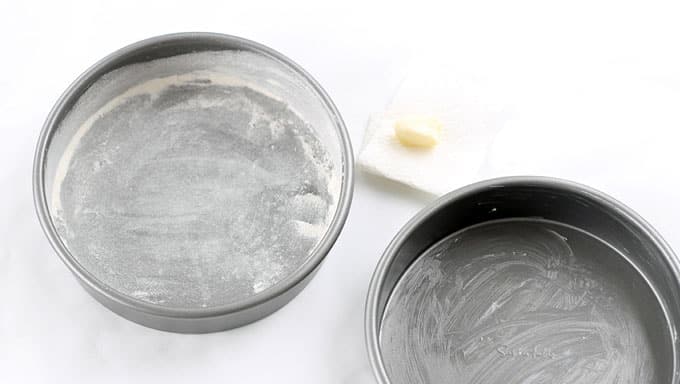
To prevent the cake from sticking to the pan, place about a tablespoon of softened butter on a paper towel and coat the bottom and sides of the pan. Alternatively, you can spray with cooking spray. Now sprinkle a handful of flour all over the bottom of the pan. Shake the pan side to side and tap the sides and bottom of the pan with your palms to spread the flour evenly. Turn the pan over the sink to remove excess flour.
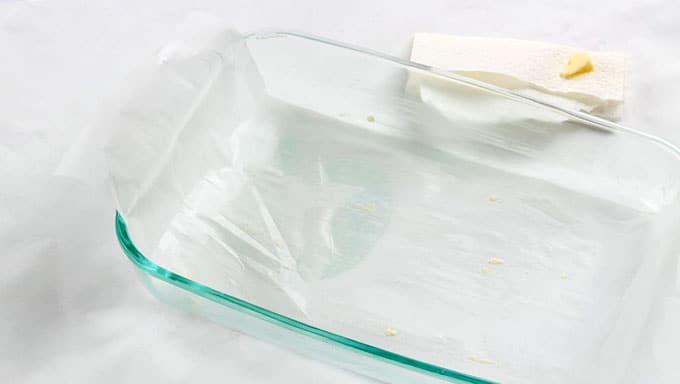
You may also line the pan first with parchment paper. This gives you extra insurance. I rarely use parchment paper for round cakes, but because I want to remove this larger-size cake from the pan, I will use parchment here so I can simply lift the cake out without having to overturn it. To avoid the cake “bunching” in the corners from crumpled parchment, I cut out a piece the same width as the bottom of the pan, but extra long so I will have “handles” at the sides to later lift out the cake. After you line the bottom with parchment, grease the paper just as you would the pan, as indicated above, and don’t forget the sides!
Mix your batter.
As baking is all about chemistry, follow the recipe closely and add ingredients in the order suggested.
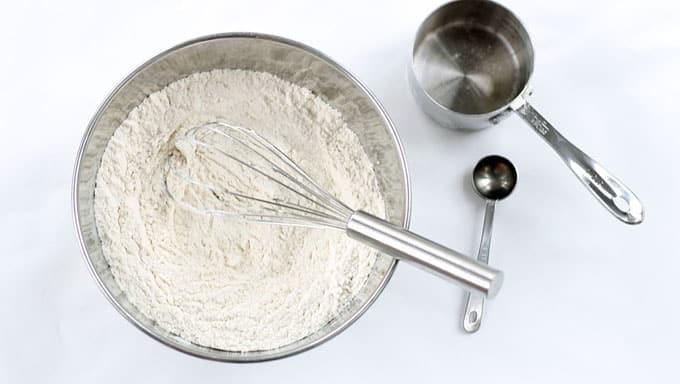
To sift the dry ingredients (flour, salt and leavener), you needn’t use a sifter if you don’t have one. Simply place the dry ingredients in a bowl and stir a few times with a whisk.
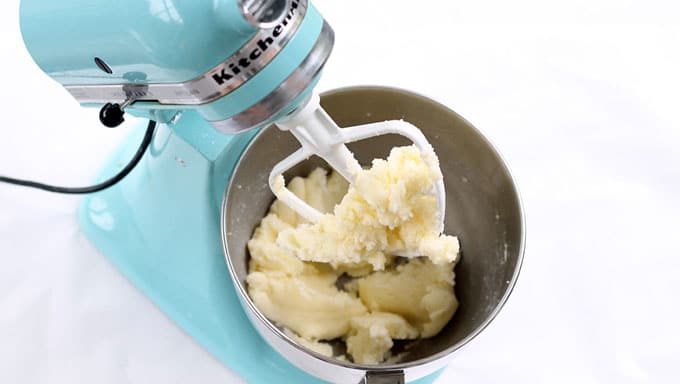
You’ll usually have to cream together the butter and sugar. Make sure it’s well blended, preferably with an electric hand mixer or a standing mixer fitted with the flat beater. Add your additional ingredients as instructed, scraping down the sides of the bowl as needed, until you have your cake batter all ready.
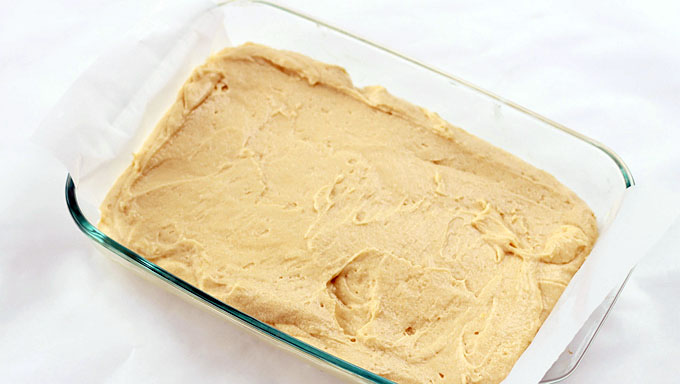
Pour into the prepared pans and you’re ready to bake.
Time to bake!
Once you mix your batter, you’ll want to place it in the oven right away, which is why preheating is so important. If your batter sits around too long, the chemical reactions will start where you don’t want it to: in the cold, lonely kitchen and not in the warm comfort of the oven. Unless stated otherwise, position the rack in the center of the oven. Bake on only one rack at a time, meaning don’t stack multiple pans on different racks. It’s wise to rotate the cake half way through baking in case your oven does not heat evenly. If you’re using a convection oven, the one rack and rotating rules don’t apply, as convection ovens heat evenly throughout. However, make sure to read the manufacturer’s instructions on adjusting temperatures for convection baking.
Take it out of the oven.
Is the cake done? When following a recipe, this is the time to take liberties. Because of differences in size and types of pans, oven effectiveness, oven power, altitude, the absence of oven fairies and other mysterious elements, baking time may differ from that stated in the recipe. So use the recipe as a general guideline, but rely on your own judgment.
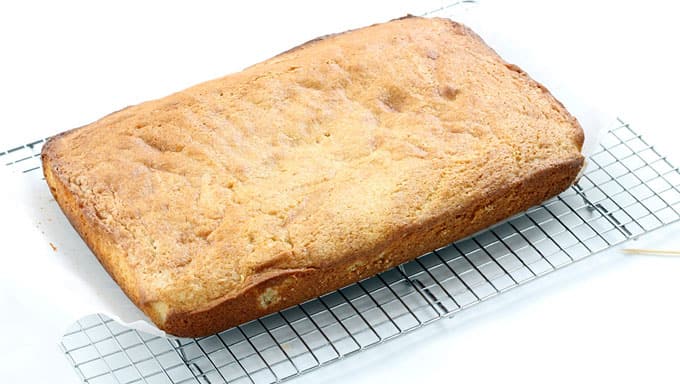
The cake is done when it is firm to the touch, and if you press down lightly on the top, it springs back. The cake should also pull away a bit from the sides. A toothpick inserted in the center of the cake will come out clean. Take the cake out too early, and it may sink. Take the cake out too late, and it will be too dry. So watch the cake closely in the last ten minutes of baking. Now take that awesomeness out of the oven and let it cool in the pan on a baking rack for 5 to 10 minutes. If you are removing from the pan, run a sharp knife around the sides and invert onto the baking rack, or lift the cake out of the pan by the parchment paper “handles,” and cool completely on a baking rack before frosting.
Cool and frost.
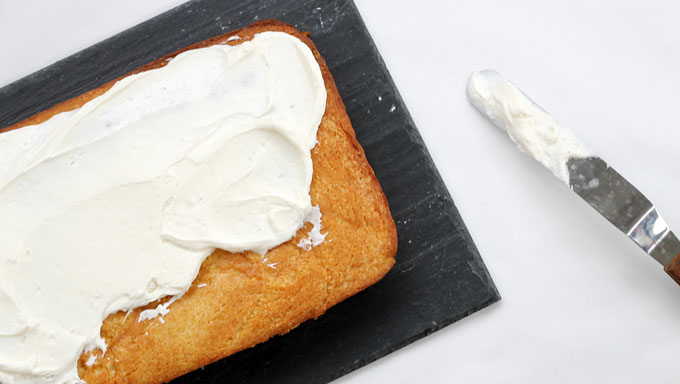
Once your cake is cool, place the cake on a cake board, cake stand or plate and frost and decorate any way you like. This sprinkle coated cake is a clever, easy method of decorating.
Altitude matters.
Less air pressure at higher altitudes means cakes rise more and the liquid evaporates more quickly, drying the cake. So if you’re over 3,500 feet:
- Increase oven temperature by 15 to 25 degrees
- Increase liquid by 2 tablespoons for each cup
- Decrease sugar by 1 tablespoon for each cup and leavener by 1/8 teaspoon for each teaspoon
- You may also need to reduce the baking time
Now you can impress everyone with your newest survival skill: Baking a cake from scratch. Have your friends over for cake and to tell tales of the times you changed your own tire, performed the Heimlich, defended yourself against a bear—and made a perfect cake!