(function() {
document.addEventListener('DOMContentLoaded', function() {
var componentMetadata = JSON.parse('\x7b\x22componentName\x22\x3a\x22ActionToolbar_d4f0b4cc-dd76-4537-857b-56997525ceb8\x22,\x22deferOptions\x22\x3a\x7b\x22deferComponent\x22\x3atrue,\x22deferType\x22\x3a\x22OnDemand\x22,\x22deferId\x22\x3a\x22r8cbe6814fead4c86864c90412f05291d\x22,\x22deferredContainerId\x22\x3a\x22\x2ffloatingActionToolbar\x2ffloatingActionToolbar_Interop\x22,\x22deferredContainerView\x22\x3a\x22InteropDeferWrapper\x22\x7d,\x22viewName\x22\x3a\x22ActionToolbar\x22\x7d');
var configuration = {"contentId":"ea40766d-c1a7-499d-b8fa-e15bd5e554b1","toolbarSettings":{"id":"d4f0b4cc-dd76-4537-857b-56997525ceb8","regAction":"FAVORITE","eSourceCode":16797,"namePassedToEvents":"ArticleStandardLongFormToolbar","buttons":[{"providerName":"pinterest","providerNamePassedToEvents":"Pinterest","shareUrlFormat":"//pinterest.com/pin/create/link/?url={0}","id":"76def9a1-42e6-4e8d-b963-2bb41556cef1","allowedForAnonymousUsers":true,"type":"Social","displayName":"Pinterest","toggleDisplayName":"","namePassedToEvents":"Pinterest","cssClassName":"atButtonPinterest","privacyOptOutMessage":"\u003cdiv class=\u0027privacyMessage\u0027\u003e\n\u003ch3\u003eThis feature is not available with your current cookie settings.\u003c/h3\u003e\n\u003cp\u003eYou can \u003ca href=\u0027#\u0027 data-show-preference-center=\u00271\u0027\u003eupdate your privacy settings\u003c/a\u003e to enable this content. Please enable “Functional Cookies” to use this feature.\u003c/p\u003e\n\u003c/div\u003e","showPrivacyOptOutMessage":false},{"addFavoriteErrorMessage":"Sorry, something went wrong. Please save again.","removeFavoriteErrorMessage":"Error occurred while removing from favorites","regAction":"FAVORITE","eSourceCode":16797,"isCurrentUserAnonymous":false,"isFavoriteItem":false,"id":"718b4e01-b2be-40cf-8f0c-bca3b01db0ed","allowedForAnonymousUsers":false,"type":"Favorite","displayName":"Save","toggleDisplayName":"Saved","namePassedToEvents":"Favorite","cssClassName":"atButtonFavorite","privacyOptOutMessage":"\u003cdiv class=\u0027privacyMessage\u0027\u003e\n\u003ch3\u003eThis feature is not available with your current cookie settings.\u003c/h3\u003e\n\u003cp\u003eYou can \u003ca href=\u0027#\u0027 data-show-preference-center=\u00271\u0027\u003eupdate your privacy settings\u003c/a\u003e to enable this content. Please enable “Functional Cookies” to use this feature.\u003c/p\u003e\n\u003c/div\u003e","showPrivacyOptOutMessage":false},{"providerName":"facebook","providerNamePassedToEvents":"Facebook","shareUrlFormat":"//facebook.com/sharer/sharer.php?u={0}","id":"efdb520e-282a-4ae1-8a04-1d444442d622","allowedForAnonymousUsers":true,"type":"Social","displayName":"Facebook","toggleDisplayName":"","namePassedToEvents":"Facebook","cssClassName":"atButtonFacebook","privacyOptOutMessage":"\u003cdiv class=\u0027privacyMessage\u0027\u003e\n\u003ch3\u003eThis feature is not available with your current cookie settings.\u003c/h3\u003e\n\u003cp\u003eYou can \u003ca href=\u0027#\u0027 data-show-preference-center=\u00271\u0027\u003eupdate your privacy settings\u003c/a\u003e to enable this content. Please enable “Functional Cookies” to use this feature.\u003c/p\u003e\n\u003c/div\u003e","showPrivacyOptOutMessage":false},{"templateId":"ec5776a6-84cf-4f91-ba79-ace5d6ae2fa2","dialogHeading":"Email Article","emailCode":"TBSP_ContentEmail","dialogSettings":{"cancelButtonText":"Cancel","copyToSenderLabel":"Send a Copy to Myself","emailAddressesLabel":"* Email Address(es)","emailInstructionText":"Separate email addresses with commas","fromText":"From:","privacyPolicyText":"\u003cp\u003e\u0026copy;2026 General Mills, Inc. All Rights Reserved. This information will only be used to send an email to your friend(s) and will not be saved. Please read our \u003ca rel=\u0022noopener noreferrer\u0022 rel=\u0022noopener noreferrer\u0022 href=\u0022http://www.generalmills.com/company/privacy-policies/privacy-policy-us\u0022 target=\u0022_blank\u0022 shape=\u0022rect\u0022\u003ePrivacy Policy\u003c/a\u003e.\u003c/p\u003e","requiredFieldText":"* Required","sendButtonText":"Send","senderEmailAddressLabel":"* Your Email Address","senderFirstNameLabel":"* Your First Name","sendToText":"Send To:"},"id":"1b476610-b2bd-4a56-ba87-47a4798f6dcb","allowedForAnonymousUsers":true,"type":"Email","displayName":"Email","toggleDisplayName":"","namePassedToEvents":"Email","cssClassName":"atButtonEmail","privacyOptOutMessage":"\u003cdiv class=\u0027privacyMessage\u0027\u003e\n\u003ch3\u003eThis feature is not available with your current cookie settings.\u003c/h3\u003e\n\u003cp\u003eYou can \u003ca href=\u0027#\u0027 data-show-preference-center=\u00271\u0027\u003eupdate your privacy settings\u003c/a\u003e to enable this content. Please enable “Functional Cookies” to use this feature.\u003c/p\u003e\n\u003c/div\u003e","showPrivacyOptOutMessage":false},{"layoutParameter":"p%3d1","id":"ab4bf4fc-919a-4252-81ca-c39edb8eadf0","allowedForAnonymousUsers":true,"type":"Print","displayName":"Print","toggleDisplayName":"","namePassedToEvents":"Print","cssClassName":"atButtonPrint","privacyOptOutMessage":"\u003cdiv class=\u0027privacyMessage\u0027\u003e\n\u003ch3\u003eThis feature is not available with your current cookie settings.\u003c/h3\u003e\n\u003cp\u003eYou can \u003ca href=\u0027#\u0027 data-show-preference-center=\u00271\u0027\u003eupdate your privacy settings\u003c/a\u003e to enable this content. Please enable “Functional Cookies” to use this feature.\u003c/p\u003e\n\u003c/div\u003e","showPrivacyOptOutMessage":false}],"isSticky":true},"userSettings":{"isCurrentUserAnonymous":true,"isFavoriteItem":false,"isAnonymousUserWithFavorites":false},"pageAttributes":{"url":"https%3a%2f%2fwww.tablespoon.com%2fposts%2fhow-to-brine-chicken","contentId":"ea40766d-c1a7-499d-b8fa-e15bd5e554b1"},"recaptchaPublicKey":"6LfW_icUAAAAAL_CG700pddUxLNYIxgRJe3vOg2Z"};
var moduleName = 'actionToolbar';
var isVueModule = true;
GeneralMills.PandoSites.RegisterControlInstance(moduleName, configuration, componentMetadata, isVueModule)
});
})();
Introduction
A dry chicken dinner is definitely not a winner, but there’s an easy solution to your chewy chicken woes: brining! Surprisingly easy, brining is the simple trick to perfectly juicy, flavorful chicken. You may have heard of brining turkeys around Thanksgiving, but brining is great for any kind of meal. In fact, it will transform your chicken and make it so delicious you’ll wonder how you ever went without brining. So follow our easy steps and we’ll show you how to brine a chicken, how long to brine a chicken and the types of brines you can use. Let’s get started.
Why Should You Brine?
You may be asking yourself, why bother brining at all? What are the benefits of brining? It’s just another step to add to the cooking process, right? But trust us when we say brining is worth it. It’s very easy, and can transform regular chicken into the most tender, juicy, and flavorful meat you’ve ever had. Brining is very popular for special occasions like Thanksgiving when you want to really impress, but with a little planning, it’s great for weeknight meals too.
How Does Brining Work?
If you’re wondering what the magic behind brining is, there is one very simple answer: salt. Wet or dry, brines work because the salt helps the meat retain moisture. How? By breaking down proteins in the meat. When those proteins break down, the meat won’t contract while cooking which means less water is lost, thus a more juicy plump bird. Plus, the salt does double duty and thoroughly seasons the meat, hence, more flavor.
Now, to wet or dry brine, that is the question. Wet brines, take a bit longer, but will help add moisture. And because they take longer to brine, they have a lot of flavor. Dry brines, however, will retain only the natural juices of the meat without adding in other liquids, which means the flavor is more intense. It’s also faster and the skin will be crisper. Both are delicious, so it comes down to time and preference.
Time is of extreme importance when brining, the longer the brine the better. Dry brines can be left on for just a short time if cooking small cuts of meat or you if are in a hurry, but for a dry brine to really work its magic, leave it on for 12 to 24 hours or up to 3 days. Wet brines should be left for at least 12 hours and up to 2 days.
What Can You Brine?
Once you’ve decided to brine, what can you actually brine? You can obviously brine chicken and turkeys, but did you know you could also brine pork? Just make sure when choosing your meat that it’s untreated. So avoid meat labeled “kosher,” “enhanced,” or “self-basting.” If you try to brine one of these you’ll end up with really salty meat.
Types of Chicken to Brine
There are many types of chicken to brine. You can of course brine a whole chicken, or you can brine just chicken thighs, legs, breasts, or wings. Brining chicken wings before frying or baking means moist, well-seasoned wings. Chicken breasts are smaller cuts and brine quickly, perfect for weeknight meals. You can brine a chicken breast in as little as 15-30 minutes. And don’t worry; you can brine partially thawed chicken. So there’s no reason not to give this trick a try if you want to enhance your casual weeknight meal.
How to Brine a Chicken
Now that we’ve covered the basics, its time to actually learn how to brine a chicken, both using wet brine and dry brine. Basically, you’ll mix a few ingredients together, add in the chicken, and wait.
This feature is not available with your current cookie settings.
You can update your privacy settings to enable this content. Please enable all cookies to use this feature.
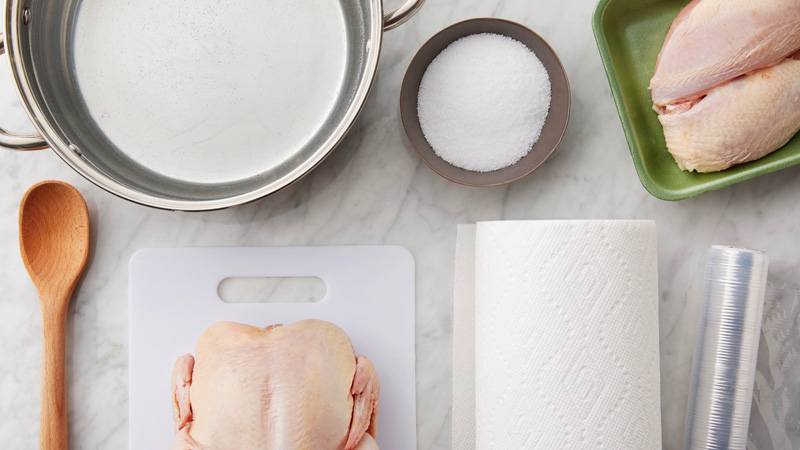
HOW TO WET BRINE A CHICKEN
First, the classic wet brine. Wet brining a chicken is easy, but takes a bit longer (don’t worry, the payoff is worth it).
Step 1: As mentioned before, the key ingredient to a brine is salt, and when it comes to wet brines, it’s all about the salt to liquid ratio. For a classic wet brine, use about 1 1/4 cups of kosher salt per gallon of water. Then just adjust the amounts to whatever is necessary to fully submerge your chicken. Again, it’s okay to brine partially thawed meat.
You can also add sugar; although it’s not required, it does help brown the skin when cooking. Any kind of sweetener works (white, brown, honey, or molasses, just to name a few) and you can add about the same amount as the salt, or less if you prefer. Herbs and spices, like peppercorns, bay leaves, rosemary, garlic, and citrus, can also be added to the mix, but aren’t necessary.
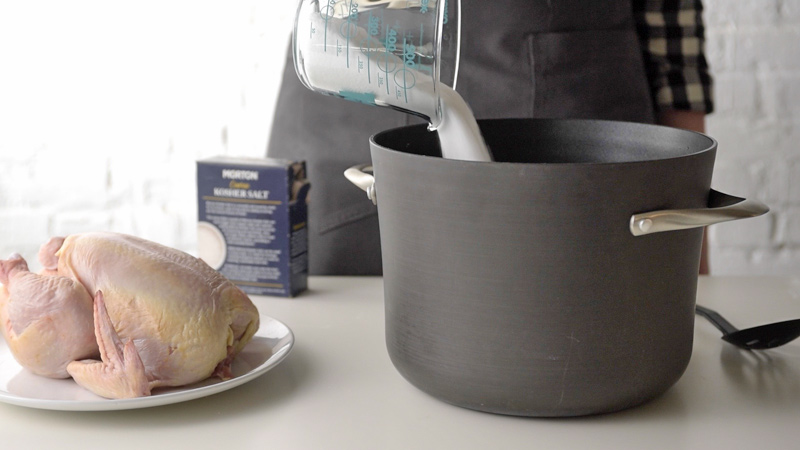
Step 2: Bring your brining mixture to a boil and stir to allow the salt (and sugar if using) to dissolve. Then let it cool completely. Do not try to submerge raw chicken into hot or warm liquid. It will raise the temperature of the meat, which could lead to loads of bad bacteria.
Step 3: Once the brine is completely cooled, submerge the chicken into the liquid. You can leave the bird whole, or break it down into pieces first.
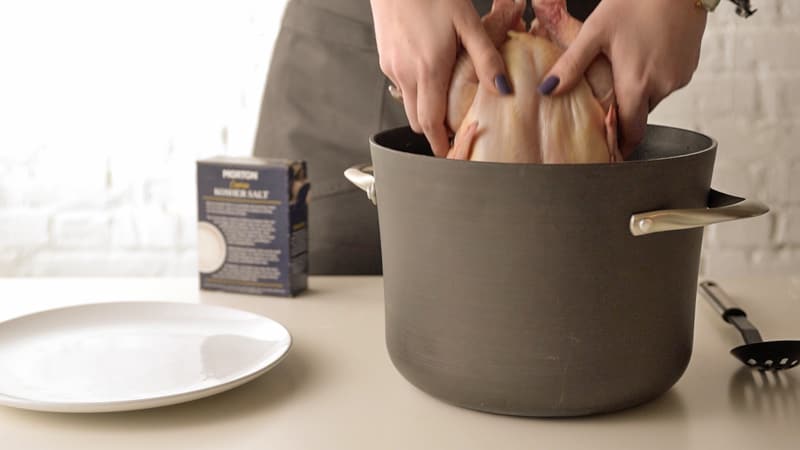
Cover the pot with plastic wrap, and refrigerate for at least 12 hours or up to 2 days. Some recipes mention brining your bird in an ice filled cooler, but to be sure your brine and bird stay cold enough and avoid any food safety issues, it’s best to keep it in the refrigerator.
Step 4: After the desired length of time, remove the chicken from the brining liquid, dry with paper towels and cook.
HOW TO DRY BRINE A CHICKEN
If wet brines aren’t your things, dry brines are just as good, maybe even better. They’re easier, faster, and result in richly flavored meat due to only retaining its own natural juices. Here are the basics to a dry brine.
Step 1: Use 1/2 cup of kosher salt, two tablespoons of baking power, and any herbs or spices you want and mix together in a bowl.

Step 2: Use paper towels to pat dry your chicken.
Step 3: Generously sprinkle the brine mixture over the entire bird, rubbing it into the skin, until the outside of the bird is completely covered. Depending on the size of your bird, you may not need to use all of the mix; too much and it may end up over salted, so don’t cake it on.
Step 4: Loosely cover chicken with plastic wrap and refrigerate for at least 12 hours or up to 3 days.
Step 5: Rinse off the brine, pat the chicken dry, and cook. (Make sure the skin is very dry before cooking so that it will get nice and crispy.)
Types of Brine for Different Cooking Methods
Now, what types of brine should you use for the style of cooking? Brining a chicken for smoking, roasting, grilling, and buttermilk brine for fried chicken, all have their benefits, and they’re all good ideas.
How to Brine a Chicken for Grilling
Brining meat before grilling is a worthwhile step because it will help keep moisture in lean cuts of meat that would otherwise dry out over the high heat of a grill. You can use a classic wet brine of water, salt, sugar, and spices of your choice, think cumin, coriander, garlic, cinnamon, black pepper, etc.…and get creative with the liquids. Grab a few extra beers and use them in the brine!
How to Brine a Chicken for Frying
It may seem impossible to improve on fried chicken, but the secret to an even more amazing piece of fried chicken is brining. Giving the chicken a brine means the meat is seasoned and juicy, so your chicken has tons of flavor both in the breading and in the meat. You can use a classic wet brine and don’t be afraid to change up the liquid. Try pickle juice or, even better, buttermilk. A basic buttermilk brine of salt, pepper, and buttermilk adds tang and the acidity will tenderize the meat as well.
How to Brine a Chicken for Roasting or Smoking
Brining a chicken for roasting or smoking is much like grilling or frying. Prepare either a wet brine or dry brine to retain moisture and add flavor. Again, a wet brine will contain the classic mixture of water, salt, and any spices you wish to include. Adding sugar will help produce a more golden brown skin due to carmalization.
How Long to Brine Chicken
Time is clearly an important factor in brining a chicken. Generally, the longer the better, but it can vary depending on the thickness of the meat. As mentioned before, for whole chickens, classic wet brines can be left on for a minimum of 12 hours and up to 2 days. Dry brines can be as short as a few hours, but ideally at least 12 hours and up to 3 days. The longer you brine, the stronger the seasoning, the more robust the flavor, and more tender and juicy the meat will become. For small cuts of chicken, the times will vary. For chicken wings, you want to brine for up to 48 hours. For chicken breasts, brine up to 4 to 6 hours max. Any longer and it will become too salty.
Tips & Tricks for Brining Chicken
Once you’ve got the brining down, there a few extra tips and tricks to remember when brining chicken:
- Do not reuse brines. For food safety assurance, dispose of used brines.
- With dry brines you may not need to use all of the mixture.
- For extra crispy skin, add a little baking soda to dry brines. The baking soda breaks down proteins and mixes with the natural juices to form tiny bubbles, which are key to the crispy skin texture.
- Adding some sugar will help brown the skin through caramalization.
And that’s it! It may sound a bit involved, but once you start brining you’ll see how simple it is. All it takes is a little patience and planning. The payoff in juicy, tender, flavorful chicken will be completely worth it. Happy brining!
Your chicken adventure is just beginning. Get even more ideas with our best-ever chicken recipes.