(function() {
document.addEventListener('DOMContentLoaded', function() {
var componentMetadata = JSON.parse('\x7b\x22componentName\x22\x3a\x22ActionToolbar_54a65093-280d-4b2a-8a72-d13833164a15\x22,\x22deferOptions\x22\x3a\x7b\x22deferComponent\x22\x3afalse,\x22deferType\x22\x3a\x22None\x22,\x22deferId\x22\x3a\x22r6a034caf6e254eb3926465dd79931f7f\x22,\x22deferredContainerId\x22\x3a\x22\x2fmain\x2frdpRecipeDetailToolbar\x22,\x22deferredContainerView\x22\x3anull\x7d,\x22viewName\x22\x3a\x22ActionToolbar\x22\x7d');
var configuration = {"contentId":"d99d017d-cafe-46eb-8613-ceb650f97142","toolbarSettings":{"id":"54a65093-280d-4b2a-8a72-d13833164a15","registrationUrl":"/GMI/CoreSites/BC/Home/register/reg-fp","regAction":"FAVORITE","eSourceCode":11275,"namePassedToEvents":"RDPToolbar_LOWER","buttons":[{"addFavoriteErrorMessage":"Sorry, something went wrong. Please save again.","removeFavoriteErrorMessage":"Error occurred while removing from favorites","registrationUrl":"/GMI/CoreSites/BC/Home/register/reg-fp","regAction":"FAVORITE","eSourceCode":11275,"isCurrentUserAnonymous":false,"isFavoriteItem":false,"id":"718b4e01-b2be-40cf-8f0c-bca3b01db0ed","allowedForAnonymousUsers":false,"type":"Favorite","displayName":"Save","toggleDisplayName":"Saved","namePassedToEvents":"Favorite","cssClassName":"atButtonFavorite","privacyOptOutMessage":"\u003cdiv class=\u0027privacyMessage\u0027\u003e\n\u003ch3\u003eThis feature is not available with your current cookie settings.\u003c/h3\u003e\n\u003cp\u003eYou can \u003ca href=\u0027#\u0027 data-show-preference-center=\u00271\u0027\u003eupdate your privacy settings\u003c/a\u003e to enable this content. Please enable “Functional Cookies” to use this feature.\u003c/p\u003e\n\u003c/div\u003e","showPrivacyOptOutMessage":false},{"nestedButtons":[{"providerName":"pinterest","providerNamePassedToEvents":"Pinterest","shareUrlFormat":"//pinterest.com/pin/create/link/?url={0}","id":"585d4198-c691-4eae-bb63-66cc1927e44a","allowedForAnonymousUsers":true,"type":"Social","displayName":"Save To Pinterest","toggleDisplayName":"","namePassedToEvents":"Pinterest","cssClassName":"atButtonPinterest","privacyOptOutMessage":"\u003cdiv class=\u0027privacyMessage\u0027\u003e\n\u003ch3\u003eThis feature is not available with your current cookie settings.\u003c/h3\u003e\n\u003cp\u003eYou can \u003ca href=\u0027#\u0027 data-show-preference-center=\u00271\u0027\u003eupdate your privacy settings\u003c/a\u003e to enable this content. Please enable “Functional Cookies” to use this feature.\u003c/p\u003e\n\u003c/div\u003e","showPrivacyOptOutMessage":false},{"templateId":"95752b5c-7e75-4367-bca7-fdd3abb0ebcb","dialogHeading":"Email Recipe","emailCode":"TBSP_ContentEmail","dialogSettings":{"cancelButtonText":"Cancel","copyToSenderLabel":"Send a Copy to Myself","emailAddressesLabel":"* Email Address(es)","emailInstructionText":"Separate email addresses with commas","fromText":"From:","privacyPolicyText":"\u003cp\u003e\u0026copy;2026 General Mills, Inc. All Rights Reserved. This information will only be used to send an email to your friend(s) and will not be saved. Please read our \u003ca rel=\u0022noopener noreferrer\u0022 rel=\u0022noopener noreferrer\u0022 href=\u0022http://www.generalmills.com/company/privacy-policies/privacy-policy-us\u0022 target=\u0022_blank\u0022 shape=\u0022rect\u0022\u003ePrivacy Policy\u003c/a\u003e.\u003c/p\u003e","requiredFieldText":"* Required","sendButtonText":"Send","senderEmailAddressLabel":"* Your Email Address","senderFirstNameLabel":"* Your First Name","sendToText":"Send To:"},"id":"fad236f8-3084-4a50-bc7d-283bc5511677","allowedForAnonymousUsers":true,"type":"Email","displayName":"Share via Email","toggleDisplayName":"","namePassedToEvents":"Email","cssClassName":"atButtonEmail","privacyOptOutMessage":"\u003cdiv class=\u0027privacyMessage\u0027\u003e\n\u003ch3\u003eThis feature is not available with your current cookie settings.\u003c/h3\u003e\n\u003cp\u003eYou can \u003ca href=\u0027#\u0027 data-show-preference-center=\u00271\u0027\u003eupdate your privacy settings\u003c/a\u003e to enable this content. Please enable “Functional Cookies” to use this feature.\u003c/p\u003e\n\u003c/div\u003e","showPrivacyOptOutMessage":false},{"providerName":"facebook","providerNamePassedToEvents":"Facebook","shareUrlFormat":"//facebook.com/sharer/sharer.php?u={0}","id":"fc7a5260-abb4-42be-958a-d172ba87442b","allowedForAnonymousUsers":true,"type":"Social","displayName":"Share on Facebook","toggleDisplayName":"","namePassedToEvents":"Facebook","cssClassName":"atButtonFacebook","privacyOptOutMessage":"\u003cdiv class=\u0027privacyMessage\u0027\u003e\n\u003ch3\u003eThis feature is not available with your current cookie settings.\u003c/h3\u003e\n\u003cp\u003eYou can \u003ca href=\u0027#\u0027 data-show-preference-center=\u00271\u0027\u003eupdate your privacy settings\u003c/a\u003e to enable this content. Please enable “Functional Cookies” to use this feature.\u003c/p\u003e\n\u003c/div\u003e","showPrivacyOptOutMessage":false},{"successMessage":"Copied.","errorMessage":"Press Ctrl+C and Enter to copy to clipboard","successMessageDuration":3000,"errorMessageDuration":10000,"id":"263303a9-5fe6-480d-910a-608f153d379a","allowedForAnonymousUsers":true,"type":"CopyLink","displayName":"Copy Link","toggleDisplayName":"","namePassedToEvents":"Copy","cssClassName":"atButtonCopyLink","privacyOptOutMessage":"\u003cdiv class=\u0027privacyMessage\u0027\u003e\n\u003ch3\u003eThis feature is not available with your current cookie settings.\u003c/h3\u003e\n\u003cp\u003eYou can \u003ca href=\u0027#\u0027 data-show-preference-center=\u00271\u0027\u003eupdate your privacy settings\u003c/a\u003e to enable this content. Please enable “Functional Cookies” to use this feature.\u003c/p\u003e\n\u003c/div\u003e","showPrivacyOptOutMessage":false}],"id":"46a2d62f-b80c-49bf-969f-5d28640dc94a","allowedForAnonymousUsers":true,"type":"Reveal","displayName":"Share","toggleDisplayName":"","namePassedToEvents":"Share","cssClassName":"atButtonReveal","privacyOptOutMessage":"\u003cdiv class=\u0027privacyMessage\u0027\u003e\n\u003ch3\u003eThis feature is not available with your current cookie settings.\u003c/h3\u003e\n\u003cp\u003eYou can \u003ca href=\u0027#\u0027 data-show-preference-center=\u00271\u0027\u003eupdate your privacy settings\u003c/a\u003e to enable this content. Please enable “Functional Cookies” to use this feature.\u003c/p\u003e\n\u003c/div\u003e","showPrivacyOptOutMessage":false},{"layoutParameter":"p%3d1","id":"ab4bf4fc-919a-4252-81ca-c39edb8eadf0","allowedForAnonymousUsers":true,"type":"Print","displayName":"Print","toggleDisplayName":"","namePassedToEvents":"Print","cssClassName":"atButtonPrint","privacyOptOutMessage":"\u003cdiv class=\u0027privacyMessage\u0027\u003e\n\u003ch3\u003eThis feature is not available with your current cookie settings.\u003c/h3\u003e\n\u003cp\u003eYou can \u003ca href=\u0027#\u0027 data-show-preference-center=\u00271\u0027\u003eupdate your privacy settings\u003c/a\u003e to enable this content. Please enable “Functional Cookies” to use this feature.\u003c/p\u003e\n\u003c/div\u003e","showPrivacyOptOutMessage":false},{"errorMessage":"","id":"0a1bab6c-f930-4359-b8b4-a72470a4d8ee","allowedForAnonymousUsers":true,"type":"WakeLock","displayName":"Keep Screen On","toggleDisplayName":"","namePassedToEvents":"Wakelock","cssClassName":"","privacyOptOutMessage":"\u003cdiv class=\u0027privacyMessage\u0027\u003e\n\u003ch3\u003eThis feature is not available with your current cookie settings.\u003c/h3\u003e\n\u003cp\u003eYou can \u003ca href=\u0027#\u0027 data-show-preference-center=\u00271\u0027\u003eupdate your privacy settings\u003c/a\u003e to enable this content. Please enable “Functional Cookies” to use this feature.\u003c/p\u003e\n\u003c/div\u003e","showPrivacyOptOutMessage":false}],"isSticky":true},"userSettings":{"isCurrentUserAnonymous":true,"isFavoriteItem":false,"isAnonymousUserWithFavorites":false},"pageAttributes":{"url":"https%3a%2f%2fwww.tablespoon.com%2frecipes%2fcopycat-dairy-queen-ice-cream-cake%2fd99d017d-cafe-46eb-8613-ceb650f97142","contentId":"d99d017d-cafe-46eb-8613-ceb650f97142"},"recaptchaPublicKey":"6LfW_icUAAAAAL_CG700pddUxLNYIxgRJe3vOg2Z"};
var moduleName = 'actionToolbar';
var isVueModule = true;
GeneralMills.PandoSites.RegisterControlInstance(moduleName, configuration, componentMetadata, isVueModule)
});
})();
Ingredients
-
1
tub (1.5 quarts) chocolate ice cream
-
1
package (14.2 oz) Oreo cookies, crushed
-
1
jar (12.8 oz) hot fudge topping
-
1
tub (1.5 quarts) vanilla ice cream
-
24
oz frozen whipped topping, thawed
-
Betty Crocker™ candy sprinkles and Rainbow Candy Chips
(function() {
document.addEventListener('DOMContentLoaded', function() {
var componentMetadata = JSON.parse('\x7b\x22componentName\x22\x3a\x22RecipeIngredients_a2352866-1a21-4a5d-9dd4-1744f7700fb5\x22,\x22deferOptions\x22\x3a\x7b\x22deferComponent\x22\x3afalse,\x22deferType\x22\x3a\x22None\x22,\x22deferId\x22\x3a\x22r930b51ff5b164c63bcf8cd8e6d113aad\x22,\x22deferredContainerId\x22\x3a\x22\x2fmain\x2frdpIngredients\x22,\x22deferredContainerView\x22\x3anull\x7d,\x22viewName\x22\x3a\x22RecipeIngredients\x22\x7d');
var configuration = {};
var moduleName = 'recipeIngredients';
var isVueModule = false;
GeneralMills.PandoSites.RegisterControlInstance(moduleName, configuration, componentMetadata, isVueModule)
});
})();
(function() {
document.addEventListener('DOMContentLoaded', function() {
var componentMetadata = JSON.parse('\x7b\x22componentName\x22\x3a\x22DoubleClick_745c15b5-a9ad-4519-81b8-8ce6135efb93\x22,\x22deferOptions\x22\x3a\x7b\x22deferComponent\x22\x3atrue,\x22deferType\x22\x3a\x22OnDemand\x22,\x22deferId\x22\x3a\x22re7aaa1c456dd4d6ca2736a5dcabe77c9\x22,\x22deferredContainerId\x22\x3a\x22\x2fmain\x2frdpSecondaryAd\x22,\x22deferredContainerView\x22\x3a\x22DoubleClick\x22\x7d,\x22viewName\x22\x3a\x22DoubleClick\x22\x7d');
var configuration = {"adId":"OMP/tablespoon/recipes/300x250_bottom","minPageWidth":"1000","maxPageWidth":"9999","defaultMinPageWidth":"1000","defaultMaxPageWidth":"9999","size":"[[300,600],[300,250]]","refreshWhenViewed":false,"adContainerId":"1a02ed67-29c7-4bf2-a30e-4cf666d76557","doubleClickAdContainerId":"0590a481-74e8-42cd-9dd6-23fd4f886888","adCaptionText":"Advertisement","networkCode":"/15704463/","relevantMetadata":[null,null],"privacyOptOut":false,"isThirdPartyProvider":true,"thirdPartyTag":"\u003cdiv align=\u0022center\u0022 data-freestar-ad=\u0022__300x600\u0022 id=\u0022a66ff8450902447cc98dad485cecef437\u0022 data-placement-name=\u0022tablespoon-com_right_rail_1\u0022\u003e\u003c/div\u003e","sovrnCssClass":"","responsive":true,"contentType":"Recipe","itemId":"d99d017d-cafe-46eb-8613-ceb650f97142","continuesBelowText":"Recipe Continues Below"};
var moduleName = 'thirdPartyProvider';
var isVueModule = true;
GeneralMills.PandoSites.RegisterControlInstance(moduleName, configuration, componentMetadata, isVueModule)
});
})();
-
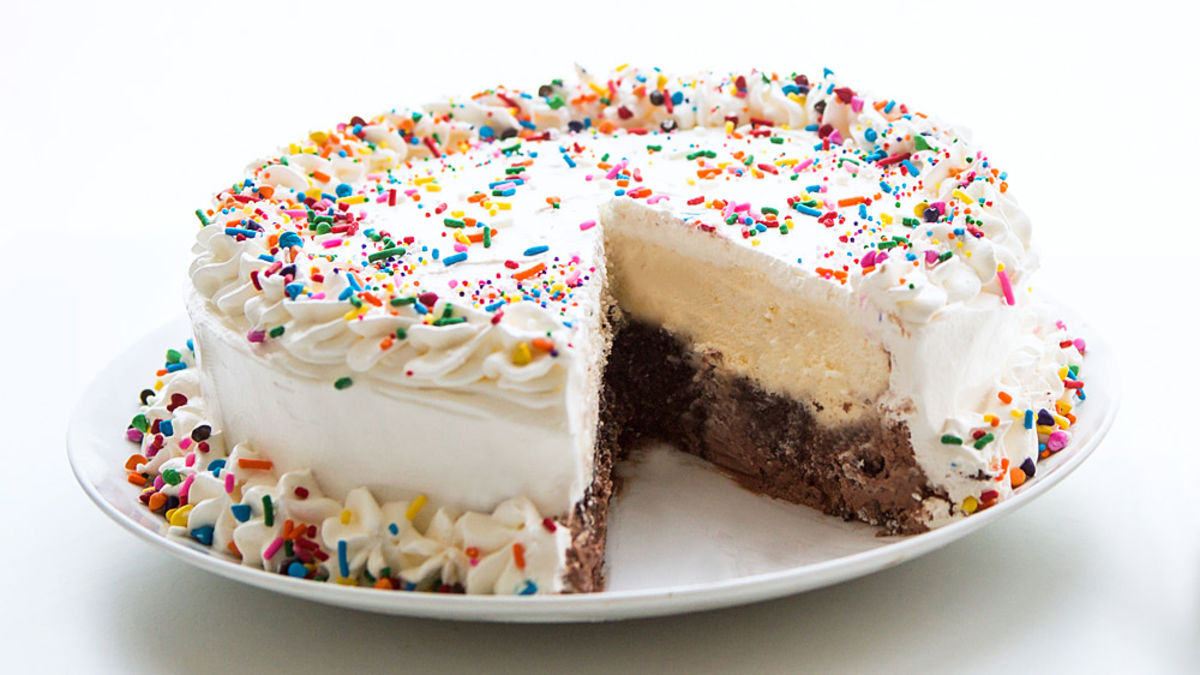
Remove chocolate and vanilla ice cream from freezer; allow to stand at room temperature for 15 minutes. Meanwhile, in a medium bowl, combine crushed Oreo™ cookies and hot fudge sauce until thoroughly mixed.
-
Scoop chocolate ice cream into a 9-inch springform pan lined with parchment paper. Top chocolate ice cream with cookie-fudge mixture and place scoops of vanilla ice cream on top of the cookie layer. Spread the ice cream flat and even with a spatula. Return to freezer until firmly frozen, at least 4 hours or overnight for best results.
-
Working quickly, remove the cake from the springform pan and transfer to a serving platter. Frost cake with whipped topping, piping decoration around the edges with an icing bag fitted with a large star tip if desired.
-
Return to freezer until firm, about 2 hours. Decorate before slicing and serving.
(function() {
document.addEventListener('DOMContentLoaded', function() {
var componentMetadata = JSON.parse('\x7b\x22componentName\x22\x3a\x22RecipeSteps_a2352866-1a21-4a5d-9dd4-1744f7700fb5\x22,\x22deferOptions\x22\x3a\x7b\x22deferComponent\x22\x3atrue,\x22deferType\x22\x3a\x22OnDemand\x22,\x22deferId\x22\x3a\x22rb5ba0d6e77d84dc48c8365dbfdc7a45b\x22,\x22deferredContainerId\x22\x3a\x22\x2fmain\x2frdpSteps\x22,\x22deferredContainerView\x22\x3a\x22RecipeDetailRedesign\x22\x7d,\x22viewName\x22\x3a\x22RecipeSteps\x22\x7d');
var configuration = {"initAreImagesHidden":false,"hideImagesEventName":"HideStepShots","showImagesEventName":"ShowStepShots","hideImagesButtonText":"Hide Images","showImagesButtonText":"Show Images","hideImagesClass":"rdpHideStepImages"};
var moduleName = 'recipeStepShots';
var isVueModule = true;
GeneralMills.PandoSites.RegisterControlInstance(moduleName, configuration, componentMetadata, isVueModule)
});
})();
910
Calories
48g
Total Fat
11g
Protein
109g
Total Carbohydrate
78g
Sugars
Nutrition Facts
Serving Size:
1 Serving
- Calories
- 910
- Calories from Fat
- 430
- Total Fat
- 48g
- 74%
- Saturated Fat
- 30g
- 149%
- Trans Fat
- 1g
- Cholesterol
- 75mg
- 26%
- Sodium
- 370mg
- 16%
- Potassium
- 540mg
- 15%
- Total Carbohydrate
- 109g
- 36%
- Dietary Fiber
- 5g
- 20%
- Sugars
- 78g
- Protein
- 11g
- Vitamin A
- 15%
- 15%
- Vitamin C
- 2%
- 2%
- Calcium
- 25%
- 25%
- Iron
- 10%
- 10%
Exchanges:
3 1/2 Starch; 0 Fruit; 4 Other Carbohydrate; 0 Skim Milk; 0 Low-Fat Milk; 0 Milk; 0 Vegetable; 0 Very Lean Meat; 0 Lean Meat; 0 High-Fat Meat; 9 Fat;
Carbohydrate Choice
7
*Percent Daily Values are based on a 2,000 calorie diet.
(function() {
document.addEventListener('DOMContentLoaded', function() {
var componentMetadata = JSON.parse('\x7b\x22componentName\x22\x3a\x22RecipeNutritionNonPrintRedesign_a2352866-1a21-4a5d-9dd4-1744f7700fb5\x22,\x22deferOptions\x22\x3a\x7b\x22deferComponent\x22\x3atrue,\x22deferType\x22\x3a\x22Simple\x22,\x22deferId\x22\x3a\x22r57ce64c2a44e42e8b5a88b50da3c77e8\x22,\x22deferredContainerId\x22\x3a\x22\x2fmain\x2frdpNutrition\x22,\x22deferredContainerView\x22\x3a\x22RecipeDetailRedesign\x22\x7d,\x22viewName\x22\x3a\x22RecipeNutritionNonPrintRedesign\x22\x7d');
var configuration = {"initIsExpanded":false,"expandEventName":"NutritionExpand","collapseEventName":"NutritionCollapse"};
var moduleName = 'recipeNutrition';
var isVueModule = true;
GeneralMills.PandoSites.RegisterControlInstance(moduleName, configuration, componentMetadata, isVueModule)
});
})();
Expert Tips
{{tipItemHeadingFormat.replace('{0}',props.index + 1)}}
(function() {
document.addEventListener('DOMContentLoaded', function() {
var componentMetadata = JSON.parse('\x7b\x22componentName\x22\x3a\x22RecipeTipsCarousel_a2352866-1a21-4a5d-9dd4-1744f7700fb5\x22,\x22deferOptions\x22\x3a\x7b\x22deferComponent\x22\x3atrue,\x22deferType\x22\x3a\x22Simple\x22,\x22deferId\x22\x3a\x22rb416534dd81d40fb85581b570d305a2f\x22,\x22deferredContainerId\x22\x3a\x22\x2fmain\x2frdpTips\x22,\x22deferredContainerView\x22\x3a\x22RecipeDetailRedesign\x22\x7d,\x22viewName\x22\x3a\x22RecipeTipsCarousel\x22\x7d');
var configuration = {"title":"Copycat Dairy Queen™ Ice Cream Cake","introduction":"We all scream for ice cream (cake). Keep the oven off and make this simple DIY ice cream cake that tastes just like the real thing.","servingSize":"1 Serving","image":{"small":{"media":"(min-width: 0px)","src":"https://mojo.generalmills.com/api/public/content/8jH7Wq7a50OAVA7pJ6NrWg_webp_base.webp?v=8e19ca9d\u0026t=e724eca7b3c24a8aaa6e089ed9e611fd"},"medium":{"media":"(min-width: 500px)","src":"https://rms-media-prod.generalmills.com/8623b3c8-cd9a-47a9-89c3-e1f1c4053e43.jpg"},"large":{"media":"(min-width: 767px)","src":"https://rms-media-prod.generalmills.com/8623b3c8-cd9a-47a9-89c3-e1f1c4053e43.jpg"},"alt":"Copycat Dairy Queen™ Ice Cream Cake"},"contributor":{"label":"by:","name":"Cheeky Kitchen","profileUrl":"/contributors/cheeky-kitchen","displayDate":{"label":"Updated","date":"Oct 5, 2017"}},"ingredientGroups":[{"ingredients":[{"quantity":"1","description":"tub (1.5 quarts) chocolate ice cream"},{"quantity":"1","description":"package (14.2 oz) Oreo cookies, crushed"},{"quantity":"1","description":"jar (12.8 oz) hot fudge topping"},{"quantity":"1","description":"tub (1.5 quarts) vanilla ice cream"},{"quantity":"24","description":"oz frozen whipped topping, thawed"},{"quantity":"","description":"Betty Crocker™ candy sprinkles and Rainbow Candy Chips"}]}],"steps":[{"description":"Remove chocolate and vanilla ice cream from freezer; allow to stand at room temperature for 15 minutes. Meanwhile, in a medium bowl, combine crushed Oreo™ cookies and hot fudge sauce until thoroughly mixed."},{"description":"Scoop chocolate ice cream into a 9-inch springform pan lined with parchment paper. Top chocolate ice cream with cookie-fudge mixture and place scoops of vanilla ice cream on top of the cookie layer. Spread the ice cream flat and even with a spatula. Return to freezer until firmly frozen, at least 4 hours or overnight for best results.","stepShotImageUrl":"//mojo.generalmills.com/api/public/content/jG0smRiVhUq_jcbnBCq8uA_webp_base.webp?v=17d55b17\u0026t=3653fe2f5ecd4a47a5a51c97e429947c"},{"description":"Working quickly, remove the cake from the springform pan and transfer to a serving platter. Frost cake with whipped topping, piping decoration around the edges with an icing bag fitted with a large star tip if desired.","stepShotImageUrl":"//mojo.generalmills.com/api/public/content/4lP5SQTVSk6nR3aRkNWA0g_webp_base.webp?v=626be47f\u0026t=3653fe2f5ecd4a47a5a51c97e429947c"},{"description":"Return to freezer until firm, about 2 hours. Decorate before slicing and serving.","stepShotImageUrl":"//mojo.generalmills.com/api/public/content/942CU7aHqUOVlEbKh8UTAQ_webp_base.webp?v=082caf93\u0026t=3653fe2f5ecd4a47a5a51c97e429947c"}],"tips":[{"title":"","description":"Place serving platter and serving plates in the freezer for 20-30 minutes before transferring the cake onto it. The bottom of your cake won’t melt when you make the move!","category":"Techniques","tipShots":[]},{"title":"","description":"Pull out the party hats, people. Fire up the ElectroHouse playlists. Forget the pricey trip to the ice cream shop. Because it’s toodarnedeasy and tres fun, too, making your own ice cream birthday cake.\r\n\r\nThe 13-year-old in my life has informed me that any proper party post will include “dank memes” and “dabbing.” Seeing as how I know nothing about either of these words, and feel far too tired to consult the oracle that is Urban Dictionary, I will dig deep into my recipe writing terminology to properly convey the celebration that is DIY ICE CREAM CAKE-MAKING.\r\n\r\nJust a handful of super simple steps, a whole lotta creative decorating fun, and by tomorrow you’ll be pulling the prettiest ice cream cake outta your fridge. Like, hello pretty.Grab a springform pan and line it with parchment. This step is optional, but it makes it easy to transfer the finished frozen cake to a serving plate. For the best fit, trace around the bottom of your pan on the parchment paper before cutting.\r\n\r\nIf you’re new to springform pans, don’t panic. They’re easy to find in everyday kitchenware stores, typically cost under $20 and are really easy to use. The whole idea here is that the cake can be built in a high-sided pan. Once frozen, the edges of the pan peel off, so you don’t have to dig your cake out of the depths of frozen metal. A good thing.\r\n\r\nPlus, springform pans are useful for homemade cheesecake making, chocolate torte cake baking and all other sorts of desserty dreams. So, handy to have in the haus.For this cake we went with basic chocolate and vanilla ice cream. But you can totally get as haywire fancy as you want. Fill it with whichever ice cream combo you please.\r\n\r\nWhen it\u0027s time to freeze your concoction, overnight is best, but sometimes you can get away with a 3-4 hour turn in le freezer. That’ll depend on your freezer, so overnight is the safe bet. Quick tip: freeze the serving plate for 15-20 minutes before transferring the ice cream cake atop. This will keep the bottom of the cake from melting.\r\n\r\nThen, grab every pack of Betty Crocker cake décor you’ve ever wanted and let your crafty fly. Sprinkles, jimmies, candy chips, candy letters, candles—decorate your cake any way you please.\r\n\r\nWhether you’re celebrating something little like a Tuesday night, or something big like a 30th birthday, this cake has party written all over it. And that, dear ones, is worth a dab. Or a dank meme. Or whatever you say when forking ice cream cake onto a happy tongue.","category":"Editorial","tipShots":[]}],"kitchenTips":[{"title":"","description":"Place serving platter and serving plates in the freezer for 20-30 minutes before transferring the cake onto it. The bottom of your cake won’t melt when you make the move!","category":"Techniques","tipShots":[]}],"additionalContent":[],"faq":[],"tipCategories":[{"categoryName":"Editorial","heading":"More About This Recipe","cssClass":"recipePartStory","expandOnInit":false,"expandText":"More +","collapseText":"Less -","expandEventName":"","collapseEventName":"","image":"","tips":[{"title":"","description":"Pull out the party hats, people. Fire up the ElectroHouse playlists. Forget the pricey trip to the ice cream shop. Because it’s toodarnedeasy and tres fun, too, making your own ice cream birthday cake.\r\n\r\nThe 13-year-old in my life has informed me that any proper party post will include “dank memes” and “dabbing.” Seeing as how I know nothing about either of these words, and feel far too tired to consult the oracle that is Urban Dictionary, I will dig deep into my recipe writing terminology to properly convey the celebration that is DIY ICE CREAM CAKE-MAKING.\r\n\r\nJust a handful of super simple steps, a whole lotta creative decorating fun, and by tomorrow you’ll be pulling the prettiest ice cream cake outta your fridge. Like, hello pretty.Grab a springform pan and line it with parchment. This step is optional, but it makes it easy to transfer the finished frozen cake to a serving plate. For the best fit, trace around the bottom of your pan on the parchment paper before cutting.\r\n\r\nIf you’re new to springform pans, don’t panic. They’re easy to find in everyday kitchenware stores, typically cost under $20 and are really easy to use. The whole idea here is that the cake can be built in a high-sided pan. Once frozen, the edges of the pan peel off, so you don’t have to dig your cake out of the depths of frozen metal. A good thing.\r\n\r\nPlus, springform pans are useful for homemade cheesecake making, chocolate torte cake baking and all other sorts of desserty dreams. So, handy to have in the haus.For this cake we went with basic chocolate and vanilla ice cream. But you can totally get as haywire fancy as you want. Fill it with whichever ice cream combo you please.\r\n\r\nWhen it\u0027s time to freeze your concoction, overnight is best, but sometimes you can get away with a 3-4 hour turn in le freezer. That’ll depend on your freezer, so overnight is the safe bet. Quick tip: freeze the serving plate for 15-20 minutes before transferring the ice cream cake atop. This will keep the bottom of the cake from melting.\r\n\r\nThen, grab every pack of Betty Crocker cake décor you’ve ever wanted and let your crafty fly. Sprinkles, jimmies, candy chips, candy letters, candles—decorate your cake any way you please.\r\n\r\nWhether you’re celebrating something little like a Tuesday night, or something big like a 30th birthday, this cake has party written all over it. And that, dear ones, is worth a dab. Or a dank meme. Or whatever you say when forking ice cream cake onto a happy tongue.","category":"Editorial","tipShots":[]}],"isExpandable":false}],"nutritionInfo":{"configuration":{"showAsTable":false,"noNutritionInformationAvailableMessage":"No nutrition information available for this recipe","poweredByText":"\u003cp\u003eNutrition information for this recipe is estimated using a leading nutrition calculation application, but is an estimate only. Actual nutrition values will vary based on the exact ingredients or brands you may use.\u003c/p\u003e\n\u003ca href=\u0022http://developer.edamam.com\u0022\u003ePowered By \u003cimg src=\u0022-/media/ABEEFB1BF16C40AEB5775A3BE02315EA.ashx\u0022 alt=\u0022Edamam\u0022 /\u003e\u003c/a\u003e","nutritionChartTitle":"Nutrition Facts","nutritionInformationLabel":"Nutrition","servingSizeText":"Serving Size:","dailyValuesDisclaimer":"*Percent Daily Values are based on a 2,000 calorie diet.","percentDailyValueText":"% Daily Value","percentDailyValueFooterTitleText":"% Daily Value*:","exchangeInformationTitleText":"Exchanges:","nutritionFactsExpandText":"More Nutrition","nutritionFactsCollapseText":"Less Nutrition"},"facts":{"carbohydrateChoice":{"amountPercent":"","amountUnits":"7","title":"Carbohydrate Choice"},"vitaminA":{"amountPercent":"15%","amountUnits":"15%","title":"Vitamin A"},"vitaminC":{"amountPercent":"2%","amountUnits":"2%","title":"Vitamin C"},"calcium":{"amountPercent":"25%","amountUnits":"25%","title":"Calcium"},"iron":{"amountPercent":"10%","amountUnits":"10%","title":"Iron"},"protein":{"amountPercent":"","amountUnits":"11g","title":"Protein"},"dietaryFiber":{"amountPercent":"20%","amountUnits":"5g","title":"Dietary Fiber"},"sugars":{"amountPercent":"","amountUnits":"78g","title":"Sugars"},"totalCarbohydrate":{"amountPercent":"36%","amountUnits":"109g","title":"Total Carbohydrate"},"sodium":{"amountPercent":"16%","amountUnits":"370mg","title":"Sodium"},"potassium":{"amountPercent":"15%","amountUnits":"540mg","title":"Potassium"},"cholesterol":{"amountPercent":"26%","amountUnits":"75mg","title":"Cholesterol"},"transFat":{"amountPercent":"","amountUnits":"1g","title":"Trans Fat"},"saturatedFat":{"amountPercent":"149%","amountUnits":"30g","title":"Saturated Fat"},"totalFat":{"amountPercent":"74%","amountUnits":"48g","title":"Total Fat"},"caloriesFromFat":{"amountPercent":"","amountUnits":"430","title":"Calories from Fat"},"calories":{"amountPercent":"","amountUnits":"910","title":"Calories"}},"servingSize":"1 Serving","exchangeInfo":"3 1/2 Starch; 0 Fruit; 4 Other Carbohydrate; 0 Skim Milk; 0 Low-Fat Milk; 0 Milk; 0 Vegetable; 0 Very Lean Meat; 0 Lean Meat; 0 High-Fat Meat; 9 Fat;","showPoweredBy":false,"showRecipeTotalTime":true,"showRecipePrepTime":true,"showCarbohydrateChoices":true},"trademarks":["Trademarks referred to herein are the properties of their respective owners."],"labels":{"ingredientsHeader":"Ingredients","stepsHeader":"Instructions","stepsImageHideText":"Hide Images","stepsImageShowText":"Show Images","stepNumberText":"Step","faqHeader":"Frequently Asked Questions","tipsHeader":"Expert Tips","tipItemHeadingFormat":"tip {0}","postedBy":"by:","copyright":"© {yyyy} ®/TM General Mills All Rights Reserved","showDrawerText":"Show","hideDrawerText":"Hide","expandDescriptionText":"More +","collapseDescriptionText":"Less -","includeScrollIndicator":false},"primaryAttributes":[{"label":"Prep Time","values":[{"text":"30","label":"min"}]},{"label":"Total","values":[{"text":"6","label":"hr"},{"text":"0","label":"min"}]},{"label":"Servings","values":[{"text":"8"}]},{"label":"Ingredients","values":[{"text":"6"}]}],"secondaryAttributes":[],"badges":[],"backgroundImageUrl":"","breadcrumbs":{"links":[{"url":"/","label":"Home"},{"url":"/recipes","label":"Recipes"}],"currentPageName":"Copycat Dairy Queen™ Ice Cream Cake"}};
var moduleName = 'recipeTipsCarousel';
var isVueModule = true;
GeneralMills.PandoSites.RegisterControlInstance(moduleName, configuration, componentMetadata, isVueModule)
});
})();
(function() {
document.addEventListener('DOMContentLoaded', function() {
var componentMetadata = JSON.parse('\x7b\x22componentName\x22\x3a\x22DoubleClick_80e5634b-4b8b-4ab6-9d42-f87399323043\x22,\x22deferOptions\x22\x3a\x7b\x22deferComponent\x22\x3atrue,\x22deferType\x22\x3a\x22OnDemand\x22,\x22deferId\x22\x3a\x22r59a1e2aff3f94672b520b2a28f3b7156\x22,\x22deferredContainerId\x22\x3a\x22\x2fmain\x2frdpSecondaryAdMobile\x22,\x22deferredContainerView\x22\x3a\x22DoubleClick\x22\x7d,\x22viewName\x22\x3a\x22DoubleClick\x22\x7d');
var configuration = {"adId":"OMP/m_tablespoon/recipes/300x250_bottom","minPageWidth":"299","maxPageWidth":"767","defaultMinPageWidth":"1000","defaultMaxPageWidth":"9999","size":"[[300,250], [300,600]]","refreshWhenViewed":false,"adContainerId":"5ed4533f-59c8-4136-91a3-bc6f29b83789","doubleClickAdContainerId":"58b5afd9-40a8-415d-9e69-998644ed766c","adCaptionText":"Advertisement","networkCode":"/15704463/","relevantMetadata":[null,null],"privacyOptOut":false,"isThirdPartyProvider":true,"thirdPartyTag":"\u003cdiv align=\u0022center\u0022 data-freestar-ad=\u0022__300x250 __336x280\u0022 id=\u0022adae702902f3d45c1ad0cdd9cc654f2f6\u0022 data-placement-name=\u0022tablespoon-com_content_standard\u0022\u003e\u003c/div\u003e","sovrnCssClass":"","responsive":true,"contentType":"Recipe","itemId":"d99d017d-cafe-46eb-8613-ceb650f97142","continuesBelowText":"Recipe Continues Below"};
var moduleName = 'thirdPartyProvider';
var isVueModule = true;
GeneralMills.PandoSites.RegisterControlInstance(moduleName, configuration, componentMetadata, isVueModule)
});
})();
(function() {
document.addEventListener('DOMContentLoaded', function() {
var componentMetadata = JSON.parse('\x7b\x22componentName\x22\x3a\x22RelatedContent_86838426-dd26-481a-9735-69435bca607d\x22,\x22deferOptions\x22\x3a\x7b\x22deferComponent\x22\x3afalse,\x22deferType\x22\x3a\x22None\x22,\x22deferId\x22\x3a\x22r9596ceab409e4435b974e971c28b238a\x22,\x22deferredContainerId\x22\x3a\x22\x2fmain\x2frdpRelatedContent1_NonDeferred\x22,\x22deferredContainerView\x22\x3anull\x7d,\x22viewName\x22\x3a\x22RelatedContent\x22\x7d');
var configuration = {"dataSourceId":"86838426-dd26-481a-9735-69435bca607d","isCurrentUserAnonymous":true,"isAnonymousUserWithFavorites":false,"relatedContentList":{"contentId":"d99d017d-cafe-46eb-8613-ceb650f97142","listSettings":{"pageSize":3,"startPage":1,"listType":1,"title":"Try These Next","useModalRegistration":false,"regAction":"","esrcCode":0,"favoriteButtonLabelFormat":"Add {0} to favorites","contentTypes":["Category"],"showImages":false,"imageSize":0,"showRatings":false,"allowFavoriting":false,"cssClassName":"relatedContentWithoutImages","favoriteButtonText":""},"items":[{"contentId":"6fe76eb3-016c-488a-beb6-09fdbc42bf4b","contentType":"Category","title":"Holiday Drinks Recipes, Dishes and Ideas from Tablespoon","isFavorite":false,"linkUrl":"/courses/drinks/holiday-drinks","numberOfRatings":"0","averageRating":"0","averageRatingStars":"0","smallImageUrl":"","mediumImageUrl":""},{"contentId":"32e81f7d-1693-42b3-89f3-645314f3f01d","contentType":"Category","title":"Hot Chocolate Recipes, Dishes and Ideas from Tablespoon","isFavorite":false,"linkUrl":"/courses/drinks/hot-chocolate","numberOfRatings":"0","averageRating":"0","averageRatingStars":"0","smallImageUrl":"","mediumImageUrl":""},{"contentId":"8677f01b-3b1f-4761-b0d4-cf5305a681d6","contentType":"Category","title":"Cakes","isFavorite":false,"linkUrl":"/courses/dessert/cake","numberOfRatings":"0","averageRating":"0","averageRatingStars":"0","smallImageUrl":"","mediumImageUrl":""}],"availableItems":[{"contentId":"6fe76eb3-016c-488a-beb6-09fdbc42bf4b","contentType":"Category","title":"Holiday Drinks Recipes, Dishes and Ideas from Tablespoon","isFavorite":false,"linkUrl":"/courses/drinks/holiday-drinks","numberOfRatings":"0","averageRating":"0","averageRatingStars":"0","smallImageUrl":"","mediumImageUrl":""},{"contentId":"32e81f7d-1693-42b3-89f3-645314f3f01d","contentType":"Category","title":"Hot Chocolate Recipes, Dishes and Ideas from Tablespoon","isFavorite":false,"linkUrl":"/courses/drinks/hot-chocolate","numberOfRatings":"0","averageRating":"0","averageRatingStars":"0","smallImageUrl":"","mediumImageUrl":""},{"contentId":"8677f01b-3b1f-4761-b0d4-cf5305a681d6","contentType":"Category","title":"Cakes","isFavorite":false,"linkUrl":"/courses/dessert/cake","numberOfRatings":"0","averageRating":"0","averageRatingStars":"0","smallImageUrl":"","mediumImageUrl":""}]}};
var moduleName = 'relatedContent';
var isVueModule = true;
GeneralMills.PandoSites.RegisterControlInstance(moduleName, configuration, componentMetadata, isVueModule)
});
})();
(function() {
document.addEventListener('DOMContentLoaded', function() {
var componentMetadata = JSON.parse('\x7b\x22componentName\x22\x3a\x22RelatedContent_9930dad2-817c-4363-b508-21f459b3c521\x22,\x22deferOptions\x22\x3a\x7b\x22deferComponent\x22\x3atrue,\x22deferType\x22\x3a\x22OnDemand\x22,\x22deferId\x22\x3a\x22rc4ec7bdc2ef5461daf6f8009f13d008a\x22,\x22deferredContainerId\x22\x3a\x22\x2fmain\x2frdpRelatedContent1\x22,\x22deferredContainerView\x22\x3a\x22RecipeDetailRedesign\x22\x7d,\x22viewName\x22\x3a\x22RelatedContent\x22\x7d');
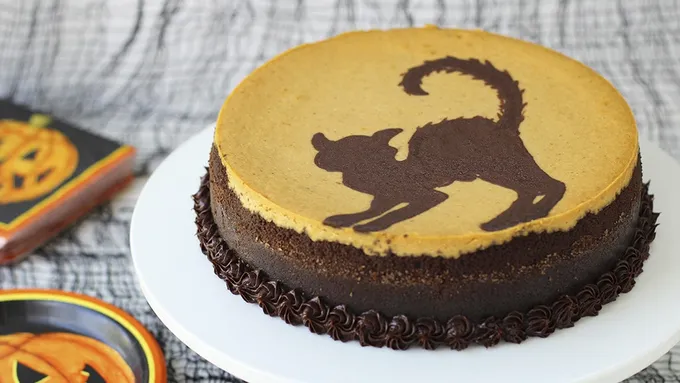
var configuration = {"dataSourceId":"9930dad2-817c-4363-b508-21f459b3c521","isCurrentUserAnonymous":true,"isAnonymousUserWithFavorites":false,"relatedContentList":{"contentId":"d99d017d-cafe-46eb-8613-ceb650f97142","listSettings":{"pageSize":6,"startPage":1,"listType":1,"title":"","useModalRegistration":false,"regAction":"","esrcCode":0,"favoriteButtonLabelFormat":"Add {0} to favorites","contentTypes":[],"showImages":true,"imageSize":1,"showRatings":false,"allowFavoriting":true,"cssClassName":"","favoriteButtonText":"Save"},"items":[{"contentId":"a964a067-8179-4a60-adef-a86cf7beb344","contentType":"Recipe","title":"Christmas Crunch Cake","isFavorite":false,"linkUrl":"/recipes/christmas-crunch-cake/a964a067-8179-4a60-adef-a86cf7beb344","numberOfRatings":"0","averageRating":"0","averageRatingStars":"0","smallImageUrl":"//mojo.generalmills.com/api/public/content/Hxf9k4zFy0CA_OMcl5XVEw_webp_base.webp?v=55574bd9\u0026t=67e847e026fb43aa8d6e3f5ef39a4ef7","mediumImageUrl":"//mojo.generalmills.com/api/public/content/Hxf9k4zFy0CA_OMcl5XVEw_webp_base.webp?v=55574bd9\u0026t=3653fe2f5ecd4a47a5a51c97e429947c"},{"contentId":"1ff99be0-b7ec-44c4-9a4b-966d003dcb32","contentType":"Recipe","title":"Frozen S’mores Crunch Cake","isFavorite":false,"linkUrl":"/recipes/frozen-smores-crunch-cake/1ff99be0-b7ec-44c4-9a4b-966d003dcb32","numberOfRatings":"0","averageRating":"0","averageRatingStars":"0","smallImageUrl":"//mojo.generalmills.com/api/public/content/OqEqxp1tpEiH2zd7o40zDw_webp_base.webp?v=47fb8a96\u0026t=67e847e026fb43aa8d6e3f5ef39a4ef7","mediumImageUrl":"//mojo.generalmills.com/api/public/content/OqEqxp1tpEiH2zd7o40zDw_webp_base.webp?v=47fb8a96\u0026t=3653fe2f5ecd4a47a5a51c97e429947c"},{"contentId":"efa4706e-fdd8-4e12-a700-aa6dee5d095c","contentType":"Recipe","title":"Peanut Butter Mousse and Chocolate Truffle","isFavorite":false,"linkUrl":"/recipes/peanut-butter-mousse-and-chocolate-truffle/efa4706e-fdd8-4e12-a700-aa6dee5d095c","numberOfRatings":"0","averageRating":"0","averageRatingStars":"0","smallImageUrl":"//mojo.generalmills.com/api/public/content/_mGolDE6AECmkFCiF5TVnw_webp_base.webp?v=b5f12df8\u0026t=67e847e026fb43aa8d6e3f5ef39a4ef7","mediumImageUrl":"//mojo.generalmills.com/api/public/content/_mGolDE6AECmkFCiF5TVnw_webp_base.webp?v=b5f12df8\u0026t=3653fe2f5ecd4a47a5a51c97e429947c"},{"contentId":"841a0d23-7bee-4137-93b8-eab315275969","contentType":"Recipe","title":"Frozen Peanut Butter Cheesecake","isFavorite":false,"linkUrl":"/recipes/frozen-peanut-butter-cheesecake/841a0d23-7bee-4137-93b8-eab315275969","numberOfRatings":"0","averageRating":"0","averageRatingStars":"0","smallImageUrl":"//mojo.generalmills.com/api/public/content/Nt_XtxpFqUSmHN4YKop77A_webp_base.webp?v=4ca4c7b2\u0026t=67e847e026fb43aa8d6e3f5ef39a4ef7","mediumImageUrl":"//mojo.generalmills.com/api/public/content/Nt_XtxpFqUSmHN4YKop77A_webp_base.webp?v=4ca4c7b2\u0026t=3653fe2f5ecd4a47a5a51c97e429947c"},{"contentId":"309b5785-165f-4aec-a80f-e7df9d2adfde","contentType":"Recipe","title":"Painted Chocolate Pumpkin Cheesecake","isFavorite":false,"linkUrl":"/recipes/painted-chocolate-pumpkin-cheesecake/309b5785-165f-4aec-a80f-e7df9d2adfde","numberOfRatings":"0","averageRating":"0","averageRatingStars":"0","smallImageUrl":"//mojo.generalmills.com/api/public/content/Xg_mDknudUaQ2df7P3EqAA_webp_base.webp?v=adf880b5\u0026t=67e847e026fb43aa8d6e3f5ef39a4ef7","mediumImageUrl":"//mojo.generalmills.com/api/public/content/Xg_mDknudUaQ2df7P3EqAA_webp_base.webp?v=adf880b5\u0026t=3653fe2f5ecd4a47a5a51c97e429947c"},{"contentId":"1d3ac7fc-6df0-4370-806a-ec8895df7281","contentType":"Recipe","title":"Puerto Rican Coquito Cheesecake","isFavorite":false,"linkUrl":"/recipes/puerto-rican-coquito-cheesecake/1d3ac7fc-6df0-4370-806a-ec8895df7281","numberOfRatings":"0","averageRating":"0","averageRatingStars":"0","smallImageUrl":"//mojo.generalmills.com/api/public/content/nWnvprlIH0mfIIhahPiaMg_webp_base.webp?v=51419cca\u0026t=67e847e026fb43aa8d6e3f5ef39a4ef7","mediumImageUrl":"//mojo.generalmills.com/api/public/content/nWnvprlIH0mfIIhahPiaMg_webp_base.webp?v=51419cca\u0026t=3653fe2f5ecd4a47a5a51c97e429947c"}],"availableItems":[{"contentId":"a964a067-8179-4a60-adef-a86cf7beb344","contentType":"Recipe","title":"Christmas Crunch Cake","isFavorite":false,"linkUrl":"/recipes/christmas-crunch-cake/a964a067-8179-4a60-adef-a86cf7beb344","numberOfRatings":"0","averageRating":"0","averageRatingStars":"0","smallImageUrl":"//mojo.generalmills.com/api/public/content/Hxf9k4zFy0CA_OMcl5XVEw_webp_base.webp?v=55574bd9\u0026t=67e847e026fb43aa8d6e3f5ef39a4ef7","mediumImageUrl":"//mojo.generalmills.com/api/public/content/Hxf9k4zFy0CA_OMcl5XVEw_webp_base.webp?v=55574bd9\u0026t=3653fe2f5ecd4a47a5a51c97e429947c"},{"contentId":"1ff99be0-b7ec-44c4-9a4b-966d003dcb32","contentType":"Recipe","title":"Frozen S’mores Crunch Cake","isFavorite":false,"linkUrl":"/recipes/frozen-smores-crunch-cake/1ff99be0-b7ec-44c4-9a4b-966d003dcb32","numberOfRatings":"0","averageRating":"0","averageRatingStars":"0","smallImageUrl":"//mojo.generalmills.com/api/public/content/OqEqxp1tpEiH2zd7o40zDw_webp_base.webp?v=47fb8a96\u0026t=67e847e026fb43aa8d6e3f5ef39a4ef7","mediumImageUrl":"//mojo.generalmills.com/api/public/content/OqEqxp1tpEiH2zd7o40zDw_webp_base.webp?v=47fb8a96\u0026t=3653fe2f5ecd4a47a5a51c97e429947c"},{"contentId":"efa4706e-fdd8-4e12-a700-aa6dee5d095c","contentType":"Recipe","title":"Peanut Butter Mousse and Chocolate Truffle","isFavorite":false,"linkUrl":"/recipes/peanut-butter-mousse-and-chocolate-truffle/efa4706e-fdd8-4e12-a700-aa6dee5d095c","numberOfRatings":"0","averageRating":"0","averageRatingStars":"0","smallImageUrl":"//mojo.generalmills.com/api/public/content/_mGolDE6AECmkFCiF5TVnw_webp_base.webp?v=b5f12df8\u0026t=67e847e026fb43aa8d6e3f5ef39a4ef7","mediumImageUrl":"//mojo.generalmills.com/api/public/content/_mGolDE6AECmkFCiF5TVnw_webp_base.webp?v=b5f12df8\u0026t=3653fe2f5ecd4a47a5a51c97e429947c"},{"contentId":"841a0d23-7bee-4137-93b8-eab315275969","contentType":"Recipe","title":"Frozen Peanut Butter Cheesecake","isFavorite":false,"linkUrl":"/recipes/frozen-peanut-butter-cheesecake/841a0d23-7bee-4137-93b8-eab315275969","numberOfRatings":"0","averageRating":"0","averageRatingStars":"0","smallImageUrl":"//mojo.generalmills.com/api/public/content/Nt_XtxpFqUSmHN4YKop77A_webp_base.webp?v=4ca4c7b2\u0026t=67e847e026fb43aa8d6e3f5ef39a4ef7","mediumImageUrl":"//mojo.generalmills.com/api/public/content/Nt_XtxpFqUSmHN4YKop77A_webp_base.webp?v=4ca4c7b2\u0026t=3653fe2f5ecd4a47a5a51c97e429947c"},{"contentId":"309b5785-165f-4aec-a80f-e7df9d2adfde","contentType":"Recipe","title":"Painted Chocolate Pumpkin Cheesecake","isFavorite":false,"linkUrl":"/recipes/painted-chocolate-pumpkin-cheesecake/309b5785-165f-4aec-a80f-e7df9d2adfde","numberOfRatings":"0","averageRating":"0","averageRatingStars":"0","smallImageUrl":"//mojo.generalmills.com/api/public/content/Xg_mDknudUaQ2df7P3EqAA_webp_base.webp?v=adf880b5\u0026t=67e847e026fb43aa8d6e3f5ef39a4ef7","mediumImageUrl":"//mojo.generalmills.com/api/public/content/Xg_mDknudUaQ2df7P3EqAA_webp_base.webp?v=adf880b5\u0026t=3653fe2f5ecd4a47a5a51c97e429947c"},{"contentId":"1d3ac7fc-6df0-4370-806a-ec8895df7281","contentType":"Recipe","title":"Puerto Rican Coquito Cheesecake","isFavorite":false,"linkUrl":"/recipes/puerto-rican-coquito-cheesecake/1d3ac7fc-6df0-4370-806a-ec8895df7281","numberOfRatings":"0","averageRating":"0","averageRatingStars":"0","smallImageUrl":"//mojo.generalmills.com/api/public/content/nWnvprlIH0mfIIhahPiaMg_webp_base.webp?v=51419cca\u0026t=67e847e026fb43aa8d6e3f5ef39a4ef7","mediumImageUrl":"//mojo.generalmills.com/api/public/content/nWnvprlIH0mfIIhahPiaMg_webp_base.webp?v=51419cca\u0026t=3653fe2f5ecd4a47a5a51c97e429947c"}]}};
var moduleName = 'relatedContent';
var isVueModule = true;
GeneralMills.PandoSites.RegisterControlInstance(moduleName, configuration, componentMetadata, isVueModule)
});
})();
- Trademarks referred to herein are the properties of their respective owners.
© 2026 ®/TM General Mills All Rights Reserved
(function() {
document.addEventListener('DOMContentLoaded', function() {
var componentMetadata = JSON.parse('\x7b\x22componentName\x22\x3a\x22DoubleClick_34589d2e-66d8-4e9a-9c4f-fb0e3ab39458\x22,\x22deferOptions\x22\x3a\x7b\x22deferComponent\x22\x3atrue,\x22deferType\x22\x3a\x22OnDemand\x22,\x22deferId\x22\x3a\x22r22bf4a2222f4431d8df8ebe9be3fcdeb\x22,\x22deferredContainerId\x22\x3a\x22\x2fmain\x2frdpTernaryAd\x22,\x22deferredContainerView\x22\x3a\x22DoubleClick\x22\x7d,\x22viewName\x22\x3a\x22DoubleClick\x22\x7d');
var configuration = {"adId":"OMP/tablespoon/recipes/300x250_bottom2","minPageWidth":"1000","maxPageWidth":"9999","defaultMinPageWidth":"1000","defaultMaxPageWidth":"9999","size":"[[300,600],[300,250]]","refreshWhenViewed":false,"adContainerId":"0ba31f7e-e478-4993-a3cc-e180c14ab0b0","doubleClickAdContainerId":"809b8625-9253-444a-8ad7-391f36bbe964","adCaptionText":"Advertisement","networkCode":"/15704463/","relevantMetadata":[null,null],"privacyOptOut":false,"isThirdPartyProvider":true,"thirdPartyTag":"\u003cdiv align=\u0022center\u0022 data-freestar-ad=\u0022__300x600\u0022 id=\u0022a9dd1fd51437e4e84804622c3fbbe5c46\u0022 data-placement-name=\u0022tablespoon-com_right_rail_1\u0022\u003e\u003c/div\u003e","sovrnCssClass":"","responsive":true,"contentType":"Recipe","itemId":"d99d017d-cafe-46eb-8613-ceb650f97142","continuesBelowText":"Recipe Continues Below"};
var moduleName = 'thirdPartyProvider';
var isVueModule = true;
GeneralMills.PandoSites.RegisterControlInstance(moduleName, configuration, componentMetadata, isVueModule)
});
})();