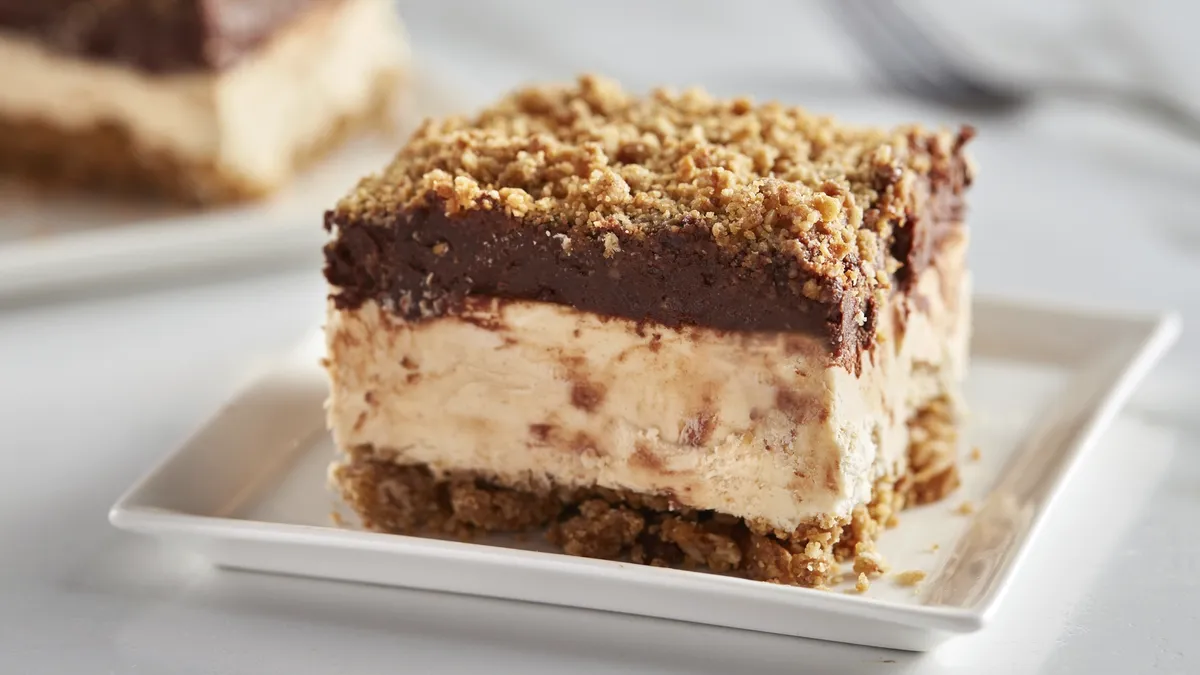
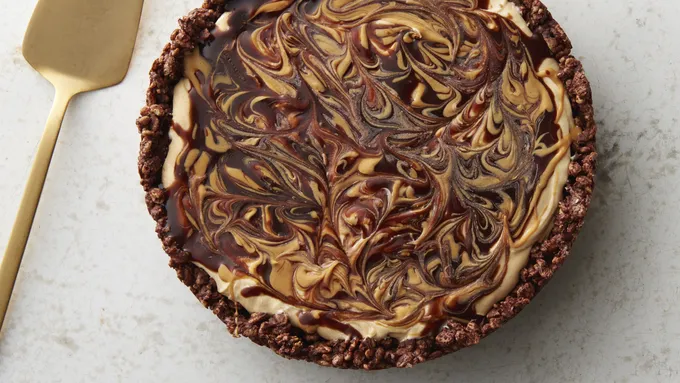
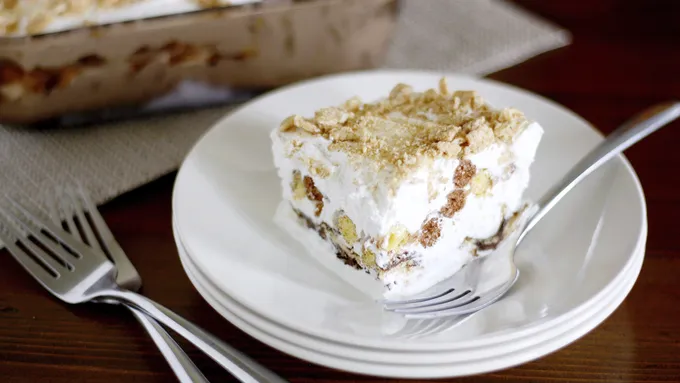
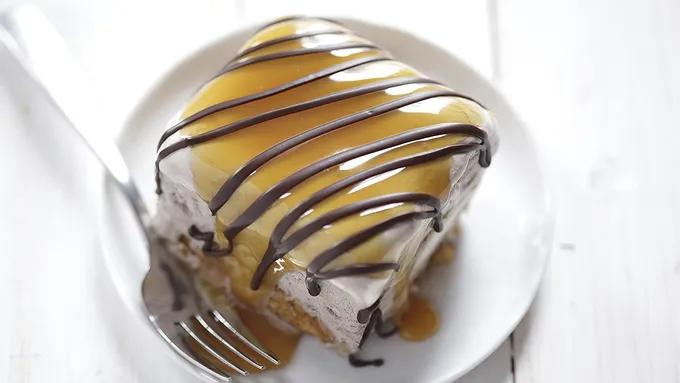
Creamy, smooth peanut butter filling topped with chocolate and crunch makes for one cool dessert.
More About This Recipe
- Gather round, all ‘ye peanut butter lovers and dinner party hosts! This is your cake. The creamy, smooth peanut butter filling combined with just the right amount of chocolate and crunch makes for a seriously divine dessert. And it’s make-ahead. And it’s impressive. And it’s easy to pull together. You can even make this with one less step and leave out the chocolate. But if you do so, we can’t be friends. Kidding. (Sort of.) But it still has just as much divinity without chocolate—that’s how good it is! If you don’t have both a hand mixer and a standing mixer, not to worry. You can use either for both the whipping cream and the filling. Just make sure you use clean bowls for each. You'll be amazed at how easy this dessert comes together. And how deliciously decadent it is. You’re welcome.
Frozen Peanut Butter Crunch Cake
- Prep Time 20 min
- Total 3 hr 20 min
- Servings 12
- Ingredients 11
Ingredients
- 1 box (8.9 oz) box Nature Valley™ Crunchy Granola Bars, peanut butter flavor
- 2 tablespoons brown sugar
- 1/4 cup all-purpose flour
- 3 tablespoons melted butter
- 1 cup heavy whipping cream
- 8 oz cream cheese
- 3/4 cup peanut butter
- 1/2 cup confectioner’s sugar
- 1 teaspoon vanilla extract
- 1 (8 oz) tub frozen whipped topping (optional)
- 2 cups semi-sweet chocolate chips (optional)
Instructions
-
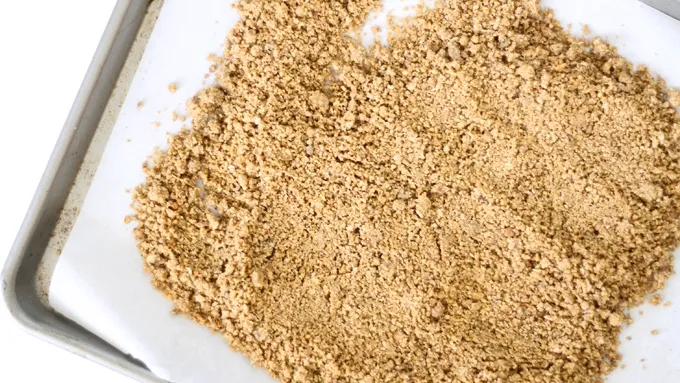
Step1Preheat oven to 350° F. Line a baking tray with parchment paper and set aside. Unwrap all granola bars and place them in a food processor. Process until the granola bars are finely ground. Transfer to a bowl and stir in the brown sugar, flour and melted butter. Spread the mixture on baking tray. Bake for 10 to 12 minutes, stirring once, until crumbs are fragrant and starting to brown. Let cool.
![]()
-
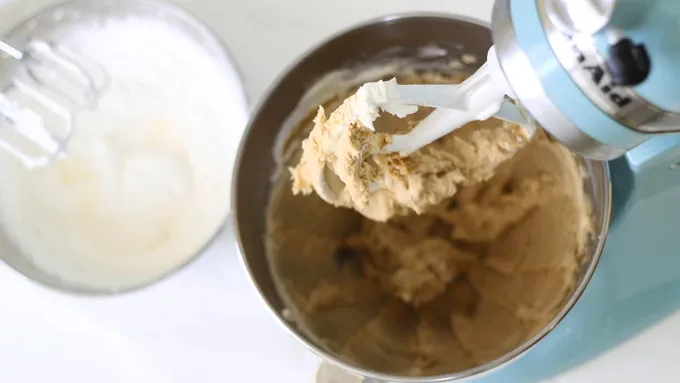
Step2To prepare the filling, use an electric hand mixer or standing mixer to whip the whipping cream until stiff peaks form. Set aside. In the bowl of a standing mixer or in a clean bowl with an electric hand mixer, place the cream cheese, peanut butter, confectioner’s sugar and vanilla. Blend well, scraping down the sides of the bowl as needed. Fold in the whipped cream and blend well again.
![]()
-
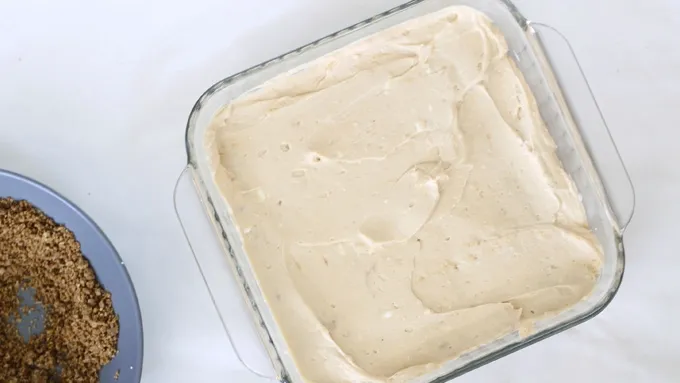
Step3Grease an 8x8-inch glass dish with butter or cooking spray. Press half of the crumb mixture at the bottom, or about 1 1/2 cups. Reserve the other half of the mixture. Pour the filling on top of the crumbs and spread evenly. If you’re not using the chocolate topping, spread the other half of the crumbs on top now. If you are using the chocolate topping, do not use the reserved crumbs yet. Cover the dish with foil and freeze for 1 hour if using chocolate, or at least 3 hours if not.
![]()
-
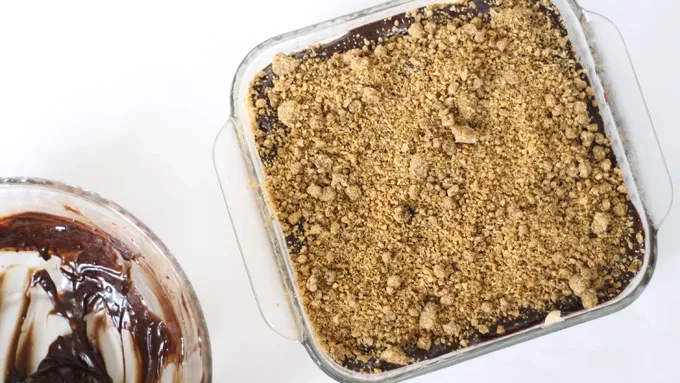
Step4To make chocolate topping, combine a tub of frozen whipped topping with 2 cups of chocolate chips in a microwave-safe bowl. Microwave for 90 seconds at 70 percent power. Stir and continue to microwave for another minute. Stir well. If needed, continue microwaving at 30 second, then 15 second intervals, until mixture is smooth. Remove dish from freezer and pour chocolate over the peanut butter filling, spreading evenly. Sprinkle the rest of the crumb mixture evenly over chocolate. Cover and freeze for 2 or more hours.
![]()
Nutrition
390
Calories
28g
Total Fat
7g
Protein
28g
Total Carbohydrate
16g
Sugars
Nutrition Facts
Serving Size: 1 Serving
- Calories
- 390
- Calories from Fat
- 250
- Total Fat
- 28g
- 43%
- Saturated Fat
- 11g
- 57%
- Trans Fat
- 1/2g
- Cholesterol
- 50mg
- 17%
- Sodium
- 260mg
- 11%
- Potassium
- 140mg
- 4%
- Total Carbohydrate
- 28g
- 9%
- Dietary Fiber
- 2g
- 8%
- Sugars
- 16g
- Protein
- 7g
% Daily Value*:
- Vitamin A
- 10%
- 10%
- Vitamin C
- 0%
- 0%
- Calcium
- 4%
- 4%
- Iron
- 4%
- 4%
Exchanges:
1/2 Starch; 0 Fruit; 1 1/2 Other Carbohydrate; 0 Skim Milk; 0 Low-Fat Milk; 0 Milk; 0 Vegetable; 0 Very Lean Meat; 0 Lean Meat; 1 High-Fat Meat; 4 Fat;Carbohydrate Choice
2
(function() {
document.addEventListener('DOMContentLoaded', function() {
var componentMetadata = JSON.parse('\x7b\x22componentName\x22\x3a\x22RelatedContent_86838426-dd26-481a-9735-69435bca607d\x22,\x22deferOptions\x22\x3a\x7b\x22deferComponent\x22\x3afalse,\x22deferType\x22\x3a\x22None\x22,\x22deferId\x22\x3a\x22rabebc18e34344392903d68617d2c81eb\x22,\x22deferredContainerId\x22\x3a\x22\x2fmain\x2frdpRelatedContent1_NonDeferred\x22,\x22deferredContainerView\x22\x3anull\x7d,\x22viewName\x22\x3a\x22RelatedContent\x22\x7d');
var configuration = {"dataSourceId":"86838426-dd26-481a-9735-69435bca607d","isCurrentUserAnonymous":true,"isAnonymousUserWithFavorites":false,"relatedContentList":{"contentId":"02076bb4-5bed-49c3-9828-d98ae8ec66b9","listSettings":{"pageSize":3,"startPage":1,"listType":1,"title":"Try These Next","useModalRegistration":false,"regAction":"","esrcCode":0,"favoriteButtonLabelFormat":"Add {0} to favorites","contentTypes":["Category"],"showImages":false,"imageSize":0,"showRatings":false,"allowFavoriting":false,"cssClassName":"relatedContentWithoutImages","favoriteButtonText":""},"items":[{"contentId":"ed3e25cc-1231-411c-86bf-a8c90adbce2f","contentType":"Category","title":"No-Bake Cheesecake","isFavorite":false,"linkUrl":"/courses/dessert/cheesecake/no-bake-cheesecake","numberOfRatings":"0","averageRating":"0","averageRatingStars":"0","smallImageUrl":"","mediumImageUrl":""},{"contentId":"afc970f5-8b27-44b0-91cd-c8845febfd72","contentType":"Category","title":"Rainbow Cake","isFavorite":false,"linkUrl":"/courses/dessert/cake/rainbow-cake","numberOfRatings":"0","averageRating":"0","averageRatingStars":"0","smallImageUrl":"","mediumImageUrl":""},{"contentId":"149d38aa-1950-42dc-a4aa-d1674dee3175","contentType":"Category","title":"Vanilla Cake","isFavorite":false,"linkUrl":"/courses/dessert/cake/vanilla-cake","numberOfRatings":"0","averageRating":"0","averageRatingStars":"0","smallImageUrl":"","mediumImageUrl":""}],"availableItems":[{"contentId":"ed3e25cc-1231-411c-86bf-a8c90adbce2f","contentType":"Category","title":"No-Bake Cheesecake","isFavorite":false,"linkUrl":"/courses/dessert/cheesecake/no-bake-cheesecake","numberOfRatings":"0","averageRating":"0","averageRatingStars":"0","smallImageUrl":"","mediumImageUrl":""},{"contentId":"afc970f5-8b27-44b0-91cd-c8845febfd72","contentType":"Category","title":"Rainbow Cake","isFavorite":false,"linkUrl":"/courses/dessert/cake/rainbow-cake","numberOfRatings":"0","averageRating":"0","averageRatingStars":"0","smallImageUrl":"","mediumImageUrl":""},{"contentId":"149d38aa-1950-42dc-a4aa-d1674dee3175","contentType":"Category","title":"Vanilla Cake","isFavorite":false,"linkUrl":"/courses/dessert/cake/vanilla-cake","numberOfRatings":"0","averageRating":"0","averageRatingStars":"0","smallImageUrl":"","mediumImageUrl":""}]}};
var moduleName = 'relatedContent';
var isVueModule = true;
GeneralMills.PandoSites.RegisterControlInstance(moduleName, configuration, componentMetadata, isVueModule)
});
})();
(function() {
document.addEventListener('DOMContentLoaded', function() {
var componentMetadata = JSON.parse('\x7b\x22componentName\x22\x3a\x22RelatedContent_9930dad2-817c-4363-b508-21f459b3c521\x22,\x22deferOptions\x22\x3a\x7b\x22deferComponent\x22\x3atrue,\x22deferType\x22\x3a\x22OnDemand\x22,\x22deferId\x22\x3a\x22rcd06e43f70ed423285bc519c0a4f22c4\x22,\x22deferredContainerId\x22\x3a\x22\x2fmain\x2frdpRelatedContent1\x22,\x22deferredContainerView\x22\x3a\x22RecipeDetailRedesign\x22\x7d,\x22viewName\x22\x3a\x22RelatedContent\x22\x7d');
var configuration = {"dataSourceId":"9930dad2-817c-4363-b508-21f459b3c521","isCurrentUserAnonymous":true,"isAnonymousUserWithFavorites":false,"relatedContentList":{"contentId":"02076bb4-5bed-49c3-9828-d98ae8ec66b9","listSettings":{"pageSize":6,"startPage":1,"listType":1,"title":"","useModalRegistration":false,"regAction":"","esrcCode":0,"favoriteButtonLabelFormat":"Add {0} to favorites","contentTypes":[],"showImages":true,"imageSize":1,"showRatings":false,"allowFavoriting":true,"cssClassName":"","favoriteButtonText":"Save"},"items":[{"contentId":"841a0d23-7bee-4137-93b8-eab315275969","contentType":"Recipe","title":"Frozen Peanut Butter Cheesecake","isFavorite":false,"linkUrl":"/recipes/frozen-peanut-butter-cheesecake/841a0d23-7bee-4137-93b8-eab315275969","numberOfRatings":"0","averageRating":"0","averageRatingStars":"0","smallImageUrl":"//mojo.generalmills.com/api/public/content/Nt_XtxpFqUSmHN4YKop77A_webp_base.webp?v=4ca4c7b2\u0026t=67e847e026fb43aa8d6e3f5ef39a4ef7","mediumImageUrl":"//mojo.generalmills.com/api/public/content/Nt_XtxpFqUSmHN4YKop77A_webp_base.webp?v=4ca4c7b2\u0026t=3653fe2f5ecd4a47a5a51c97e429947c"},{"contentId":"d4efcfda-e496-46f8-82b7-9a3e38e7a0b4","contentType":"Recipe","title":"Cinnamon Toast Crunch™ Dessert Lasagna","isFavorite":false,"linkUrl":"/recipes/cinnamon-toast-crunch-dessert-lasagna/d4efcfda-e496-46f8-82b7-9a3e38e7a0b4","numberOfRatings":"0","averageRating":"0","averageRatingStars":"0","smallImageUrl":"//mojo.generalmills.com/api/public/content/0-PegsHKcE2R2umTaf6nkw_webp_base.webp?v=be6fd40f\u0026t=67e847e026fb43aa8d6e3f5ef39a4ef7","mediumImageUrl":"//mojo.generalmills.com/api/public/content/0-PegsHKcE2R2umTaf6nkw_webp_base.webp?v=be6fd40f\u0026t=3653fe2f5ecd4a47a5a51c97e429947c"},{"contentId":"045dd547-85c4-41d0-b039-e4070353a69d","contentType":"Recipe","title":"Peanut Butter Salted Caramel Icebox Cake","isFavorite":false,"linkUrl":"/recipes/peanut-butter-salted-caramel-icebox-cake/045dd547-85c4-41d0-b039-e4070353a69d","numberOfRatings":"0","averageRating":"0","averageRatingStars":"0","smallImageUrl":"//mojo.generalmills.com/api/public/content/Q8lSaGV3MkmYSYoIv3KCWA_webp_base.webp?v=f88edc8b\u0026t=67e847e026fb43aa8d6e3f5ef39a4ef7","mediumImageUrl":"//mojo.generalmills.com/api/public/content/Q8lSaGV3MkmYSYoIv3KCWA_webp_base.webp?v=f88edc8b\u0026t=3653fe2f5ecd4a47a5a51c97e429947c"},{"contentId":"a964a067-8179-4a60-adef-a86cf7beb344","contentType":"Recipe","title":"Christmas Crunch Cake","isFavorite":false,"linkUrl":"/recipes/christmas-crunch-cake/a964a067-8179-4a60-adef-a86cf7beb344","numberOfRatings":"0","averageRating":"0","averageRatingStars":"0","smallImageUrl":"//mojo.generalmills.com/api/public/content/Hxf9k4zFy0CA_OMcl5XVEw_webp_base.webp?v=55574bd9\u0026t=67e847e026fb43aa8d6e3f5ef39a4ef7","mediumImageUrl":"//mojo.generalmills.com/api/public/content/Hxf9k4zFy0CA_OMcl5XVEw_webp_base.webp?v=55574bd9\u0026t=3653fe2f5ecd4a47a5a51c97e429947c"},{"contentId":"f3480dbd-5203-469c-82c9-ffbd571f8333","contentType":"Recipe","title":"Bourbon Bacon Crunch Cake","isFavorite":false,"linkUrl":"/recipes/bourbon-bacon-crunch-cake/f3480dbd-5203-469c-82c9-ffbd571f8333","numberOfRatings":"0","averageRating":"0","averageRatingStars":"0","smallImageUrl":"//mojo.generalmills.com/api/public/content/QUeBNEhFYkS8Ji-Or_sUpg_webp_base.webp?v=77a4026e\u0026t=67e847e026fb43aa8d6e3f5ef39a4ef7","mediumImageUrl":"//mojo.generalmills.com/api/public/content/QUeBNEhFYkS8Ji-Or_sUpg_webp_base.webp?v=77a4026e\u0026t=3653fe2f5ecd4a47a5a51c97e429947c"},{"contentId":"f805ec7f-c0f8-46ed-8b6d-5beca71fb65f","contentType":"Recipe","title":"Pina Colada Crunch Cake","isFavorite":false,"linkUrl":"/recipes/pina-colada-crunch-cake/f805ec7f-c0f8-46ed-8b6d-5beca71fb65f","numberOfRatings":"0","averageRating":"0","averageRatingStars":"0","smallImageUrl":"//mojo.generalmills.com/api/public/content/axTyfdPs50CYlVlN3WeNHQ_webp_base.webp?v=ffcf9ae1\u0026t=67e847e026fb43aa8d6e3f5ef39a4ef7","mediumImageUrl":"//mojo.generalmills.com/api/public/content/axTyfdPs50CYlVlN3WeNHQ_webp_base.webp?v=ffcf9ae1\u0026t=3653fe2f5ecd4a47a5a51c97e429947c"}],"availableItems":[{"contentId":"841a0d23-7bee-4137-93b8-eab315275969","contentType":"Recipe","title":"Frozen Peanut Butter Cheesecake","isFavorite":false,"linkUrl":"/recipes/frozen-peanut-butter-cheesecake/841a0d23-7bee-4137-93b8-eab315275969","numberOfRatings":"0","averageRating":"0","averageRatingStars":"0","smallImageUrl":"//mojo.generalmills.com/api/public/content/Nt_XtxpFqUSmHN4YKop77A_webp_base.webp?v=4ca4c7b2\u0026t=67e847e026fb43aa8d6e3f5ef39a4ef7","mediumImageUrl":"//mojo.generalmills.com/api/public/content/Nt_XtxpFqUSmHN4YKop77A_webp_base.webp?v=4ca4c7b2\u0026t=3653fe2f5ecd4a47a5a51c97e429947c"},{"contentId":"d4efcfda-e496-46f8-82b7-9a3e38e7a0b4","contentType":"Recipe","title":"Cinnamon Toast Crunch™ Dessert Lasagna","isFavorite":false,"linkUrl":"/recipes/cinnamon-toast-crunch-dessert-lasagna/d4efcfda-e496-46f8-82b7-9a3e38e7a0b4","numberOfRatings":"0","averageRating":"0","averageRatingStars":"0","smallImageUrl":"//mojo.generalmills.com/api/public/content/0-PegsHKcE2R2umTaf6nkw_webp_base.webp?v=be6fd40f\u0026t=67e847e026fb43aa8d6e3f5ef39a4ef7","mediumImageUrl":"//mojo.generalmills.com/api/public/content/0-PegsHKcE2R2umTaf6nkw_webp_base.webp?v=be6fd40f\u0026t=3653fe2f5ecd4a47a5a51c97e429947c"},{"contentId":"045dd547-85c4-41d0-b039-e4070353a69d","contentType":"Recipe","title":"Peanut Butter Salted Caramel Icebox Cake","isFavorite":false,"linkUrl":"/recipes/peanut-butter-salted-caramel-icebox-cake/045dd547-85c4-41d0-b039-e4070353a69d","numberOfRatings":"0","averageRating":"0","averageRatingStars":"0","smallImageUrl":"//mojo.generalmills.com/api/public/content/Q8lSaGV3MkmYSYoIv3KCWA_webp_base.webp?v=f88edc8b\u0026t=67e847e026fb43aa8d6e3f5ef39a4ef7","mediumImageUrl":"//mojo.generalmills.com/api/public/content/Q8lSaGV3MkmYSYoIv3KCWA_webp_base.webp?v=f88edc8b\u0026t=3653fe2f5ecd4a47a5a51c97e429947c"},{"contentId":"a964a067-8179-4a60-adef-a86cf7beb344","contentType":"Recipe","title":"Christmas Crunch Cake","isFavorite":false,"linkUrl":"/recipes/christmas-crunch-cake/a964a067-8179-4a60-adef-a86cf7beb344","numberOfRatings":"0","averageRating":"0","averageRatingStars":"0","smallImageUrl":"//mojo.generalmills.com/api/public/content/Hxf9k4zFy0CA_OMcl5XVEw_webp_base.webp?v=55574bd9\u0026t=67e847e026fb43aa8d6e3f5ef39a4ef7","mediumImageUrl":"//mojo.generalmills.com/api/public/content/Hxf9k4zFy0CA_OMcl5XVEw_webp_base.webp?v=55574bd9\u0026t=3653fe2f5ecd4a47a5a51c97e429947c"},{"contentId":"f3480dbd-5203-469c-82c9-ffbd571f8333","contentType":"Recipe","title":"Bourbon Bacon Crunch Cake","isFavorite":false,"linkUrl":"/recipes/bourbon-bacon-crunch-cake/f3480dbd-5203-469c-82c9-ffbd571f8333","numberOfRatings":"0","averageRating":"0","averageRatingStars":"0","smallImageUrl":"//mojo.generalmills.com/api/public/content/QUeBNEhFYkS8Ji-Or_sUpg_webp_base.webp?v=77a4026e\u0026t=67e847e026fb43aa8d6e3f5ef39a4ef7","mediumImageUrl":"//mojo.generalmills.com/api/public/content/QUeBNEhFYkS8Ji-Or_sUpg_webp_base.webp?v=77a4026e\u0026t=3653fe2f5ecd4a47a5a51c97e429947c"},{"contentId":"f805ec7f-c0f8-46ed-8b6d-5beca71fb65f","contentType":"Recipe","title":"Pina Colada Crunch Cake","isFavorite":false,"linkUrl":"/recipes/pina-colada-crunch-cake/f805ec7f-c0f8-46ed-8b6d-5beca71fb65f","numberOfRatings":"0","averageRating":"0","averageRatingStars":"0","smallImageUrl":"//mojo.generalmills.com/api/public/content/axTyfdPs50CYlVlN3WeNHQ_webp_base.webp?v=ffcf9ae1\u0026t=67e847e026fb43aa8d6e3f5ef39a4ef7","mediumImageUrl":"//mojo.generalmills.com/api/public/content/axTyfdPs50CYlVlN3WeNHQ_webp_base.webp?v=ffcf9ae1\u0026t=3653fe2f5ecd4a47a5a51c97e429947c"}]}};
var moduleName = 'relatedContent';
var isVueModule = true;
GeneralMills.PandoSites.RegisterControlInstance(moduleName, configuration, componentMetadata, isVueModule)
});
})();
© 2026 ®/TM General Mills All Rights Reserved
